In this tutorial, you'll create a currency converter application with Python and Tkinter. The app will allow the users to select the source currency, choose the target currency, and input the amount to convert. The application will use real-time exchange rates to convert from the source to target currency, providing accurate and up-to-date conversions.
FIXME: Add the demo video here... Currency converter demo
Through this project you'll gain hands-on experience working with Tkinter's GUI elements, handling user input, and interacting with an external API. By the end of the tutorial, you'll have a functional currency converter app and have learnt practical skills you can apply to your own Python & Tkinter projects.
Setting Up the Environment
We'll start by setting up a working environment for the project. We are using Tkinter for this project, which is included by default in most Python installations, so we don't need to install that.
If you're on Linux you may need to install it. See the Linux Tkinter installation instructions.
We'll also be using the requests library to make HTTP requests to the Exchange Rate API which we can install from PyPi using pip. We also want to create a folder to hold our project files including our Python script and images.
Below are the instructions to create a folder for our project called currency_converter, set up a virtual environment, activate it and install requests into that environment.
Purchasing Power Parity
Developers in [[ country ]] get [[ discount.discount_pc ]]% OFF on all books & courses with code [[ discount.coupon_code ]]- macOS
- Windows
- Linux
$ mkdir currency_converter/
$ cd currency_converter
$ python -m venv venv
$ source venv/bin/activate
(venv)$ pip install requests
> mkdir currency_converter/
> cd currency_converter
> python -m venv venv
> venv\Scripts\activate.bat
(venv)> pip install requests
$ mkdir currency_converter/
$ cd currency_converter
$ python -m venv venv
$ source venv/bin/activate
(venv)$ pip install requests
We will use the free Exchange Rate API to access real-time exchange rate data. It offers various endpoints that allow users to retrieve exchange rate information for different currency pairs, convert currency amounts from one currency to another, and perform other related operations. You'll have to sign up on the API page to be able to run the app.
Setting Up the Project Structure
Now that we've created the virtual environment and installed the required third-party libraries, we can set up the project structure.
Add a folder named images to the root of your project.
The images/ subfolder is where we will place the app's logo. Our application code will go in the root folder, named currency_converter.py.
currency_converter/
│
├── images/
│   └── logo.png
│
└── currency_converter.py
Getting Started with our Application
Now we have the project folder setup and requirements installed, we can start building our app. Create a new file called currency_converter.py at the root of the project folder and open this in your editor.
We'll start by adding the imports we need for our project, and building a basic window which will hold our application UI.
import os
import sys
import tkinter as tk
import tkinter.ttk as ttk
from tkinter import messagebox

import requests

class CurrencyConverterApp(tk.Tk):
    def __init__(self):
        super().__init__()
        self.geometry("500x450+300+150")
        self.title("Currency Converter")
        self.resizable(width=0, height=0)

if __name__ == "__main__":
    app = CurrencyConverterApp()
    app.mainloop()
In the above code, we import the os and sys modules from the Python standard library. Then, we import the tkinter package as tk. This shorthand is typically used with Tkinter to save repeatedly typing the full name. We also import the tkinter.ttk package which gives us access to Tkinter's themed widgets, which looker nicer than the defaults. We also import Tkinter's messagebox module for creating pop up dialogs. Finally, we import the requests library to make HTTP requests to the API so that we can get up-to-date exchange rates and convert currencies.
We start by creating the application's root window, which in Tkinter also works as the application container. To do this we create a class called CurrencyConverterApp, which inherits from the tk.Tk class. On this class we add a custom __init__() method, which is called to initialize the object, where we set up the window's attributes.
To set the window's width, height, and position, we use the geometry() method. For the window's title, we use title(). Finally, we use resizable() with the width and height set to 0 to make the window unresizable.
With the main window class created, we then add the code to instantiate the class -- creating an instance of the CurrencyConverterApp -- and start up the main loop for the application. The main loop is the event loop which handles user input events from the keyboard and mouse and passes them to the widgets.
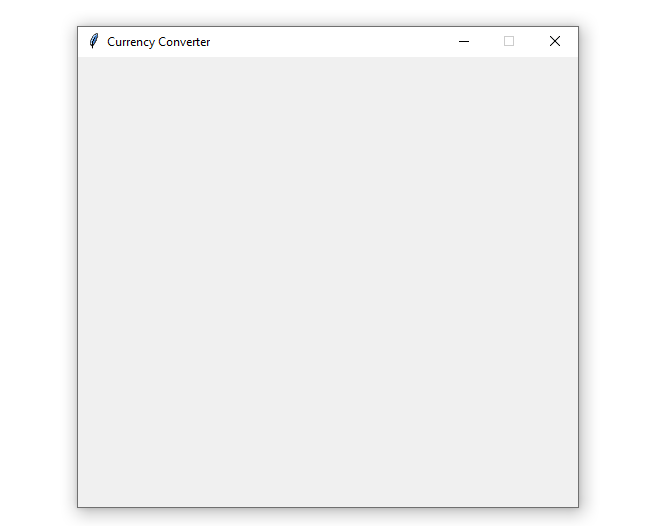
When you run this code, you see the following window on your screen:
 Currency converter's main window
There's not much to see for now: our currency converter doesn't have a functional GUI. It's just a plain window with an appropriate title and size.
Now let's create the app's GUI.
Creating the Currency Converter's GUI
To create the app's GUI, let's begin adding the widgets to the main window. We will add the following widgets:
- The app's logo
- Two labels and two associated combo boxes for selecting the source and target currency
- A label for the amount to convert and an associated entry field
- A label for displaying the conversion results
- A button to run the conversion
First lets add the logo to our application.
We'll be including small snippets of the code as we build it. But the full code is shown below, to make sure you don't get mixed up.
# ...

class CurrencyConverterApp(tk.Tk):
    # ...

    def build_gui(self):
        self.logo = tk.PhotoImage(file="images/logo.png")
        tk.Label(self, image=self.logo).pack()
In this code snippet, we first create build_gui() method to define all the widgets we need in our GUI. Inside the method, we load an image using the tk.PhotoImage() class.
Then, we create a label to display the image using the ttk.Label() class, which takes self and image as arguments. Finally, we position the label in the main window using the pack() method, which is a geometry manager in Tkinter.
To use the build_gui() method, we need to call it. To do this, add the call to self.build_gui() to the end of the __init__() method. That gives us the
following code.
import os
import sys
import tkinter as tk
import tkinter.ttk as ttk
from tkinter import messagebox

import requests

class CurrencyConverterApp(tk.Tk):
    def __init__(self):
        super().__init__()
        self.geometry("500x450+300+150")
        self.title("Currency Converter")
        self.resizable(width=0, height=0)

    def build_gui(self):
        self.logo = tk.PhotoImage(file="images/logo.png")
        tk.Label(self, image=self.logo).pack()
        self.build_gui()


if __name__ == "__main__":
    app = CurrencyConverterApp()
    app.mainloop()
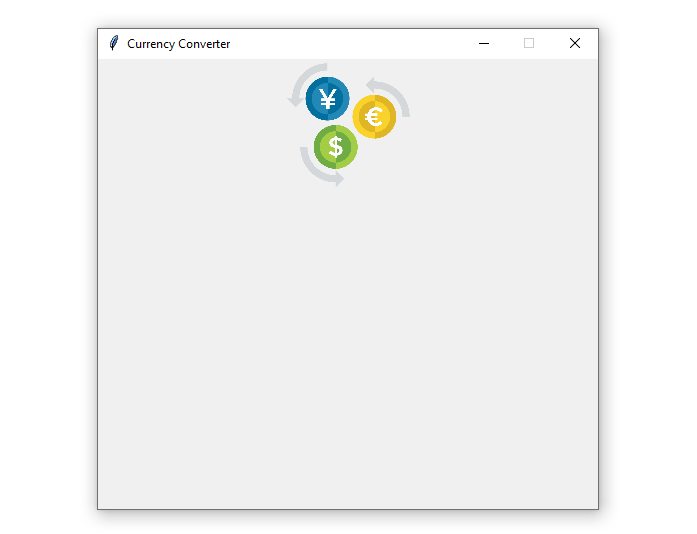
Go ahead and run the app. You'll get an output like the following:
 Currency converter window with logo
Now we can see something! We'll continue adding widgets to build up our UI.First, we will create a frame to position the widgets. Below the logo code we added in to the build_gui() method, add a frame:
# ...

class CurrencyConverterApp(tk.Tk):
    # ...

    def build_gui(self):
        self.logo = tk.PhotoImage(file="images/logo.png")
        tk.Label(self, image=self.logo).pack()
        frame = tk.Frame(self)
        frame.pack()
Here, we create a frame using the tk.Frame class. It takes self as an argument because the current window is the frame's parent. To position the frame inside the main window, we use the pack() method.
With the frame in place, we can add some more widgets. Below is the code for populating the frame:
# ...

class CurrencyConverterApp(tk.Tk):
    # ...

    def build_gui(self):
        # ...

        from_label = ttk.Label(frame, text="From:")
        from_label.grid(row=0, column=0, padx=5, pady=5, sticky=tk.W)

        to_label = ttk.Label(frame, text="To:")
        to_label.grid(row=0, column=1, padx=5, pady=5, sticky=tk.W)

        self.from_combo = ttk.Combobox(frame)
        self.from_combo.grid(row=1, column=0, padx=5, pady=5)

        self.to_combo = ttk.Combobox(frame)
        self.to_combo.grid(row=1, column=1, padx=5, pady=5)
In this code, we create two labels using the ttk.Label() class. We position them using the grid() method. Then, we create the two combo boxes using the ttk.Combobox() class, and position them both in the frame using the grid() method again.
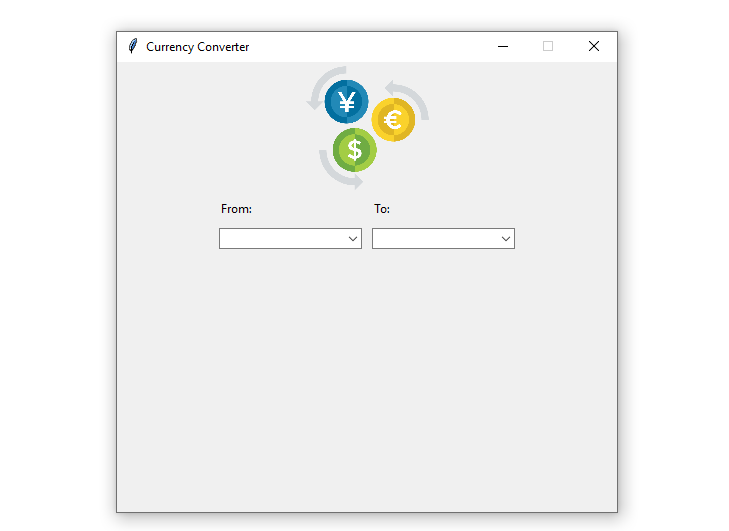
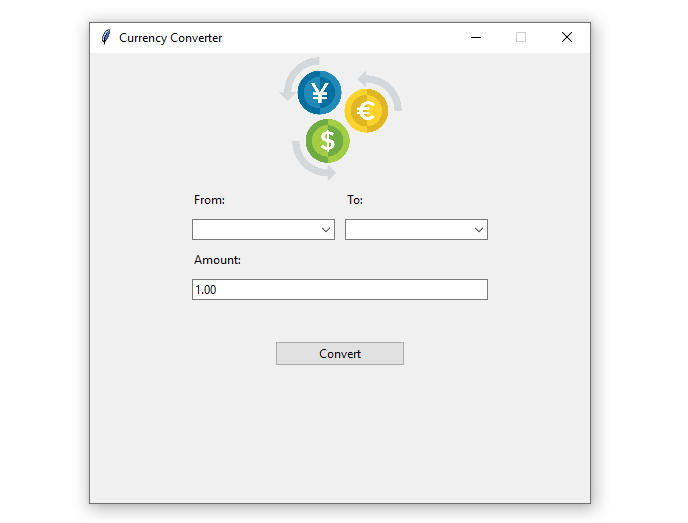
Note that we've positioned the labels in the first row of the frame while the combo boxes are in the second row. The GUI now will look something like this:
 Currency converter's GUI
Great! Your app's GUI now has the widgets for selecting the source and target currencies. Let's now add the last four widgets. Below is the code for this:
# ...

class CurrencyConverterApp(tk.Tk):
    # ...

    def build_gui(self):
        # ...

        amount_label = ttk.Label(frame, text="Amount:")
        amount_label.grid(row=2, column=0, padx=5, pady=5, sticky=tk.W)

        self.amount_entry = ttk.Entry(frame)
        self.amount_entry.insert(0, "1.00")
        self.amount_entry.grid(
            row=3, column=0, columnspan=2, padx=5, pady=5, sticky=tk.W + tk.E
        )

        self.result_label = ttk.Label(font=("Arial", 20, "bold"))
        self.result_label.pack()

        convert_button = ttk.Button(self, text="Convert", width=20)
        convert_button.pack()
In this code snippet, we add two labels using the ttk.Label() class as usual. Then, we create the entry field using the ttk.Entry() class. Next, we add the Convert button using the ttk.Button() class. All these widgets must go inside the frame object.
Note that we've positioned the amount_label and the amount_entry using the grid() method. In contrast, we've used the pack() method to place the result_label and convert_button.
The complete current code is shown below.
Never miss an update
Enjoyed this? Subscribe to get new updates straight in your Inbox.
import os
import sys
import tkinter as tk
import tkinter.ttk as ttk
from tkinter import messagebox

import requests

class CurrencyConverterApp(tk.Tk):
    def __init__(self):
        super().__init__()
        self.geometry("500x450+300+150")
        self.title("Currency Converter")
        self.resizable(width=0, height=0)
        self.build_gui()

    def build_gui(self):
        self.logo = tk.PhotoImage(file="images/logo.png")
        tk.Label(self, image=self.logo).pack()
        frame = tk.Frame(self)
        frame.pack()

        from_label = ttk.Label(frame, text="From:")
        from_label.grid(row=0, column=0, padx=5, pady=5, sticky=tk.W)

        to_label = ttk.Label(frame, text="To:")
        to_label.grid(row=0, column=1, padx=5, pady=5, sticky=tk.W)

        self.from_combo = ttk.Combobox(frame)
        self.from_combo.grid(row=1, column=0, padx=5, pady=5)

        self.to_combo = ttk.Combobox(frame)
        self.to_combo.grid(row=1, column=1, padx=5, pady=5)

        amount_label = ttk.Label(frame, text="Amount:")
        amount_label.grid(row=2, column=0, padx=5, pady=5, sticky=tk.W)

        self.amount_entry = ttk.Entry(frame)
        self.amount_entry.insert(0, "1.00")
        self.amount_entry.grid(
            row=3, column=0, columnspan=2, padx=5, pady=5, sticky=tk.W + tk.E
        )

        self.result_label = ttk.Label(font=("Arial", 20, "bold"))
        self.result_label.pack()

        convert_button = ttk.Button(self, text="Convert", width=20)
        convert_button.pack()


if __name__ == "__main__":
    app = CurrencyConverterApp()
    app.mainloop()
Run this and you'll see the following window.
 Currency converter's GUI
This is looking good now. The app's GUI is functionally complete. Even though you can't see the label showing the conversion result, this label is there and will be visible once we add something to it.
Implementing the Convert Currency Functionality
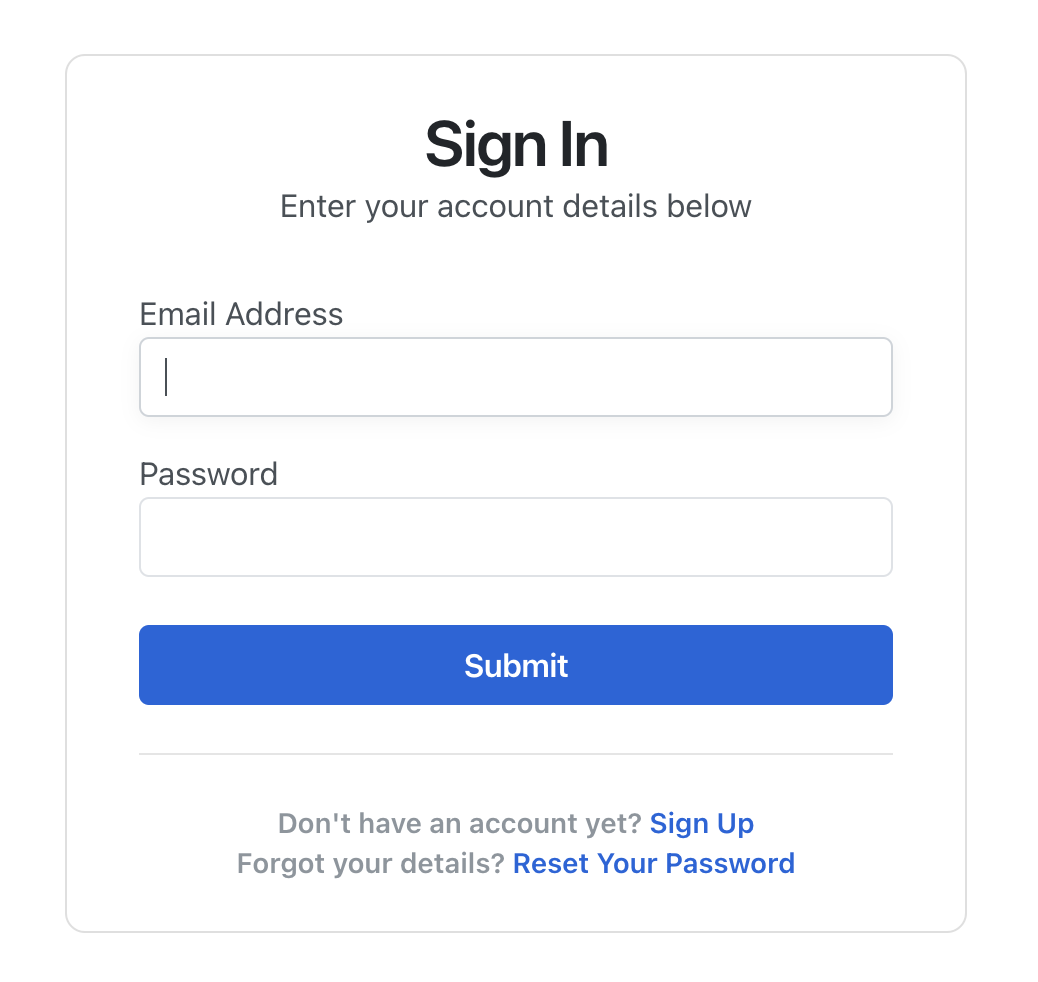
As mentioned, we will be using the Exchange Rate API to get our live currency data. To request data from the the API we need an API key. You can get one by signing up and creating an account. This is free if you only need daily rates (fine for our app).
 Exchange Rate API Sign-up Page
If you accept the terms, you will receive your API key via the email address you provided, or you can go to the dashboard, where you will see your API key as follows:
 Exchange Rate API Key
Now that we have the API key, let's implement the currency conversion functionality. First, we will add the API key as an environment variable.
On Windows, open the terminal as an administrator and run the command below. Note that you must replace the "your_api_key" part with the actual API key:
- Windows
- Windows Powershell
- macOS
- Linux
> setx API_KEY "your_api_key"
PS> setx API_KEY "your_api_key"
$ export API_KEY="your_api_key"
$ export API_KEY="your_api_key"
Now, get back to your code editor. Below the imports, paste the following code:
# ...
import requests

API_KEY = os.getenv("API_KEY")
if API_KEY is None:
    messagebox.showerror(
        "API Key Error", "API_KEY environment variable is not set."
    )
    sys.exit(1)

API_URL = f"https://v6.exchangerate-api.com/v6/{API_KEY}/"

# ...
Here, we retrieve the API key from the environment variable (that we just set) using the os.getenv() function. Using an if statement, we check whether the key was set. If not, we issue an error message and terminate the app's execution using the sys.exit() function. Then, we set up the URL to get the latest currencies.
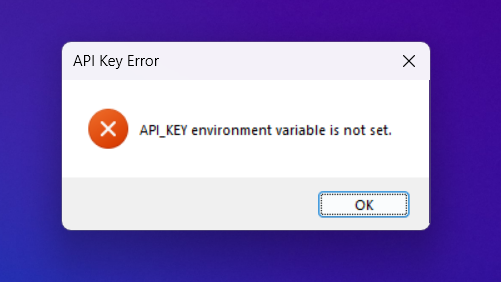
Run the code now -- in the same shell where you set the environment variable. If you see the error dialog then you know that the environment variable has not been set -- check the instructions again, and make sure the variable is set correctly in the shell where you are running the code. If you see the application as normal, then everything is good!
 The error shown when API_KEY is not set correctly in the environment.
Interacting with the API
Now we have the API_KEY set up correctly we move on to interacting with the API itself. To do this we will create a method for getting all the currencies. Let's call it get_currencies(). Below the build_gui() method, add this new method:
# ...

class CurrencyConverterApp(tk.Tk):
    # ...

    def build_gui(self):
        # ...

    def get_currencies(self):
        response = requests.get(f"{API_URL}/latest/USD")
        data = response.json()
        return list(data["conversion_rates"])
The method above sends a GET request to the given URL. We convert the received JSON response to Python objects using the json() method. Finally, we convert the conversion rates that come in the response to a Python list.
We can populate the two combo boxes using the get_currencies() method. Add the following code to the bottom of the build_gui method.
# ...

class CurrencyConverterApp(tk.Tk):
    # ...

    def build_gui(self):
        # ...

        currencies = self.get_currencies()

        self.from_combo["values"] = currencies
        self.from_combo.current(0)

        self.to_combo["values"] = currencies
        self.to_combo.current(0)
This calls the get_currencies method to get the available currencies, and then populates the two combo boxes with the returned list.
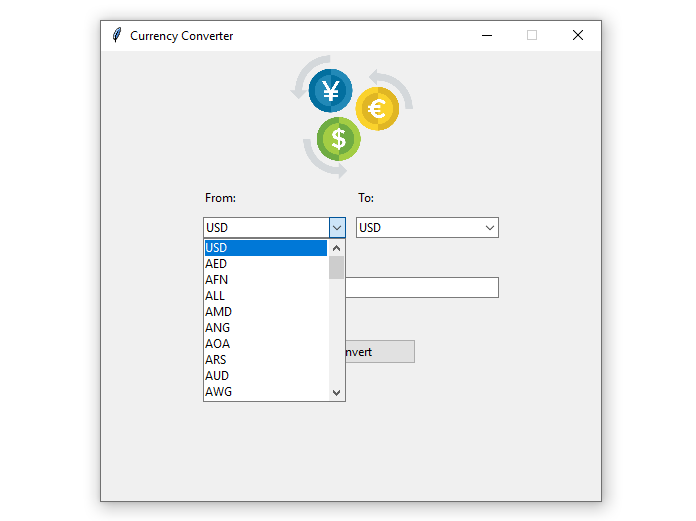
If you run the application now, you'll see that the combo-boxes now contain the currencies returned from the API. Note that we're setting the default item to USD, which is the first currency in the list.
 Populating the From currency combo box
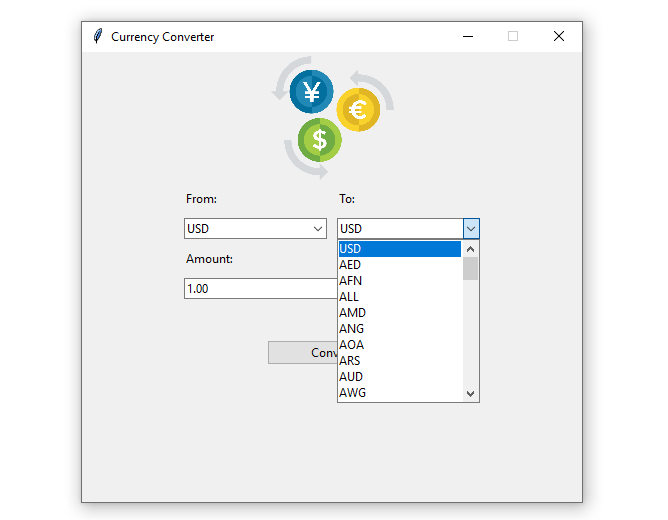 Populating the To currency combo box
Handling the Currency Conversion
The final step is to implement the actual currency conversion, using the values returned from the API. To do this we will create a method to handle this. Add new method called convert() to the bottom of our CurrencyConverterApp class.
# ...

class CurrencyConverterApp(tk.Tk):
    # ...

    def convert(self):
        src = self.from_combo.get()
        dest = self.to_combo.get()
        amount = self.amount_entry.get()
        response = requests.get(f"{API_URL}/pair/{src}/{dest}/{amount}").json()
        result = response["conversion_result"]
        self.result_label.config(text=f"{amount} {src} = {result} {dest}")
In the first three lines, we get input data from the from_combo and to_combo combo boxes and the amount_entry field using the get() method of each widget. The from_combo combo box data is named src, the to_combo combo box data is named dest, and the amount_entry field data is named amount.
To get the conversion between currencies, we make a GET request to the API using a URL constructed using the input data. The result returned from the API is again in JSON format, which we convert to a Python dictionary by calling .json(). We take the "conversion_result" from the response and use this to update the result label with the conversion result.
The final step is to hook our convert() method up to a button so we can trigger it. To do this, we will add the command argument to the button's definition. The value for this argument will be assigned the convert method object without the parentheses.
Here's how the button code will look after the update:
convert_button = ttk.Button(
            self,
            text="Convert",
            width=20,
            command=self.convert,
        )
This code binds the button to the convert() method. Now, when you click the Convert button, this method will run.
That's it! With these final touches, your currency converter application is complete. The full final code is shown below.
import os
import sys
import tkinter as tk
import tkinter.ttk as ttk
from tkinter import messagebox

import requests

API_KEY = os.getenv("API_KEY")
if API_KEY is None:
    messagebox.showerror("API Key Error", "API_KEY environment variable is not set.")
    sys.exit(1)

API_URL = f"https://v6.exchangerate-api.com/v6/{API_KEY}/"


class CurrencyConverterApp(tk.Tk):
    def __init__(self):
        super().__init__()
        self.geometry("500x450+300+150")
        self.title("Currency Converter")
        self.resizable(width=0, height=0)
        self.build_gui()

    def build_gui(self):
        self.logo = tk.PhotoImage(file="images/logo.png")
        tk.Label(self, image=self.logo).pack()
        frame = tk.Frame(self)
        frame.pack()

        from_label = ttk.Label(frame, text="From:")
        from_label.grid(row=0, column=0, padx=5, pady=5, sticky=tk.W)

        to_label = ttk.Label(frame, text="To:")
        to_label.grid(row=0, column=1, padx=5, pady=5, sticky=tk.W)

        self.from_combo = ttk.Combobox(frame)
        self.from_combo.grid(row=1, column=0, padx=5, pady=5)

        self.to_combo = ttk.Combobox(frame)
        self.to_combo.grid(row=1, column=1, padx=5, pady=5)

        amount_label = ttk.Label(frame, text="Amount:")
        amount_label.grid(row=2, column=0, padx=5, pady=5, sticky=tk.W)

        self.amount_entry = ttk.Entry(frame)
        self.amount_entry.insert(0, "1.00")
        self.amount_entry.grid(
            row=3, column=0, columnspan=2, padx=5, pady=5, sticky=tk.W + tk.E
        )

        self.result_label = ttk.Label(font=("Arial", 20, "bold"))
        self.result_label.pack()

        convert_button = ttk.Button(
            self, text="Convert", width=20, command=self.convert
        )
        convert_button.pack()

        currencies = self.get_currencies()

        self.from_combo["values"] = currencies
        self.from_combo.current(0)

        self.to_combo["values"] = currencies
        self.to_combo.current(0)

    def get_currencies(self):
        response = requests.get(f"{API_URL}/latest/USD")
        data = response.json()
        return list(data["conversion_rates"])

    def convert(self):
        src = self.from_combo.get()
        dest = self.to_combo.get()
        amount = self.amount_entry.get()
        response = requests.get(f"{API_URL}/pair/{src}/{dest}/{amount}").json()
        result = response["conversion_result"]
        self.result_label.config(text=f"{amount} {src} = {result} {dest}")


if __name__ == "__main__":
    app = CurrencyConverterApp()
    app.mainloop()
Run the final code and you will be able to convert amounts between any of the supported currencies. For example, select USD and EUR in the from and to combo boxes and enter a conversion amount of 100. The application will call the API and update the label with the result of the conversion, like follows:
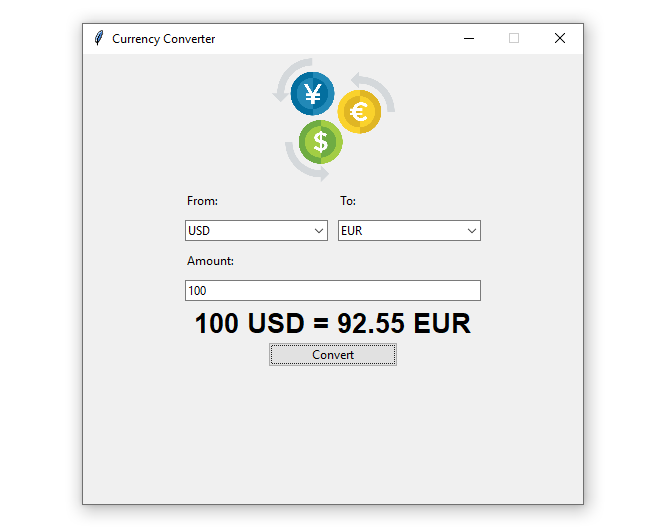 Running currency converter app
Conclusion
Well done! You've built a functional currency converter application with Python & Tkinter. You've learnt the basics of building up a UI using Tkinter's widgets and layouts, how to use APIs to fill widgets with values and perform operations in response to user input.
If you want to take it further, think about some ways that you could improve the usability or extend the functionality of this application:
- Do you have some conversions you do regularly? Add a way to quickly apply "favorite" currency conversions to the UI.
- Add buttons to set standard amounts (10, 100, 1000) for conversion.
- Use multiple API requests to show historic values (1 day ago, 1 week ago, 1 year ago) using the historic data API.
See if you can add these yourself! If you want to go further with Tkinter, take a look at our complete TKinter tutorial.
Packaging Python Applications with PyInstaller by Martin Fitzpatrick — This step-by-step guide walks you through packaging your own Python applications from simple examples to complete installers and signed executables.
