Do you ever find yourself needing to take a quick note of some information but have nowhere to put it? Then this app is for you! This virtual sticky notes (or Post-it notes) app allows you to keep short text notes quickly from anywhere via the system tray. Create a new note, paste what you need in. It'll stay there until you delete it.
The application is written in PySide6 and the notes are implemented as decoration-less windows, that is windows without any controls. Notes can be dragged around the desktop and edited at will. Text in the notes and note positions are stored in a SQLite database, via SQLAlchemy, with note details and positions being restored on each session.
This is quite a complicated example, but we'll be walking through it slowly step by step. The full source code is available, with working examples at each stage of the development if you get stuck.
Setting Up the Working Environment
In this tutorial, we'll use the PySide6 library to build the note app's GUI. We'll assume that you have a basic understanding of PySide6 apps.
To learn the basics of PySide6, check out the complete PySide6 Tutorials or my book Create GUI Applications with Python & PySide6
To store the notes between sessions, we will use SQLAlchemy with a SQLite database (a file). Don't worry if you're not familiar with SQLAlchemy, we won't be going deep into that topic & have working examples you can copy.
With that in mind, let's create a virtual environment and install our requirements into it. To do this, you can run the following commands:
Create GUI Applications with Python & Qt6 by Martin Fitzpatrick — (PyQt6 Edition) The hands-on guide to making apps with Python — Over 10,000 copies sold!
- macOS
- Windows
- Linux
$ mkdir notes/
$ cd notes
$ python -m venv venv
$ source venv/bin/activate
(venv)$ pip install pyside6 sqlalchemy
> mkdir notes/
> cd notes
> python -m venv venv
> venv\Scripts\activate.bat
(venv)> pip install pyside6 sqlalchemy
$ mkdir notes/
$ cd notes
$ python -m venv venv
$ source venv/bin/activate
(venv)$ pip install pyside6 sqlalchemy
With these commands, you create a notes/ folder for storing your project. Inside that folder, you create a new virtual environment, activate it, and install PySide6 and SQLAlchemy from PyPi.
For platform-specific troublshooting, check the Working With Python Virtual Environments tutorial.
Building the Notes GUI
Let's start by building a simple notes UI where we can create, move and close notes on the desktop. We'll deal with persistance later.
The UI for our desktop sticky notes will be a bit strange since there is no central window, all the windows are independent yet look identical (aside from the contents). We also need the app to remain open in the background, using the system tray or toolbar, so we can show/hide the notes again without closing and re-opening the application each time.
We'll start by defining a single note, and then deal with these other issues later. Create a new file named notes.py and add the following outline application to it.
import sys

from PySide6.QtWidgets import QApplication, QTextEdit, QVBoxLayout, QWidget

app = QApplication(sys.argv)


class NoteWindow(QWidget):
    def __init__(self):
        super().__init__()
        layout = QVBoxLayout()
        self.text = QTextEdit()
        layout.addWidget(self.text)
        self.setLayout(layout)


note = NoteWindow()
note.show()
app.exec()
In this code we first create a Qt QApplication instance. This needs to be done before creating our widgets. Next we define a simple custom window class NoteWindow by subclassing QWidget. We add a vertical layout to the window, and enter a single QTextEdit widget. We then create an instance of this window object as note and show it by calling .show(). This puts the window on the desktop. Finally, we start up our application by calling app.exec().
You can run this file like any other Pythons script.
python notes.py
When the applicaton launches you'll see the following on your desktop.
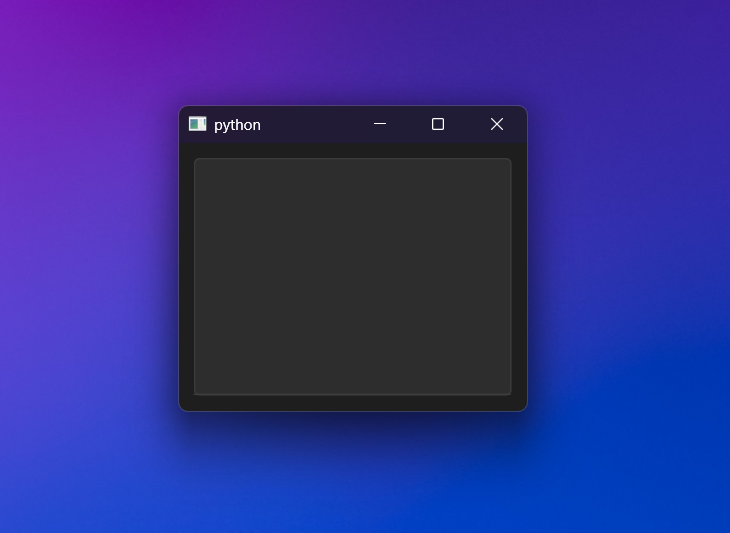 Simple "notes" window on the desktop
If you click in the text editor in the middle, you can enter some text.
Technically this is a note, but we can do better.
Styling our notes
Our note doesn't look anything like a sticky note yet. Let's change that by applying some simple styles to it.
Firstly we can change the colors of the window, textarea and text. In Qt there are multiple ways to do this -- for example, we could override the system palette definition for the window. However, the simplest approach is to use QSS, which is Qt's version of CSS.
import sys

from PySide6.QtWidgets import QApplication, QTextEdit, QVBoxLayout, QWidget

app = QApplication(sys.argv)


class NoteWindow(QWidget):
    def __init__(self):
        super().__init__()
        self.setStyleSheet(
            "background: #FFFF99; color: #62622f; border: 0; font-size: 16pt;"
        )
        layout = QVBoxLayout()
        self.text = QTextEdit()
        layout.addWidget(self.text)
        self.setLayout(layout)


note = NoteWindow()
note.show()
app.exec()
In the code above we have set a background color of hex #ffff99 for our note window, and set the text color to hex #62622f a sort of muddy brown. The border:0 removes the frame from the text edit, which otherwise would appear as a line on the bottom of the window. Finally, we set the font size to 16 points, to make the notes easier to read.
If you run the code now you'll see this, much more notely note.
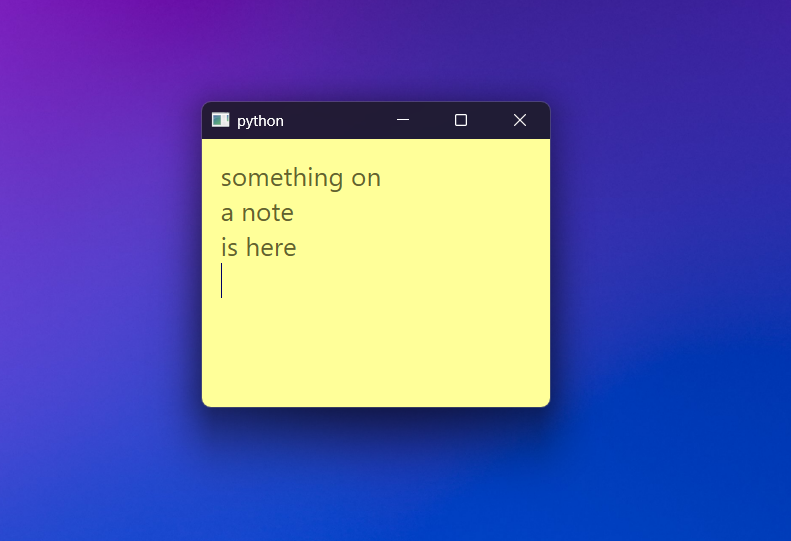 The note with the QSS styling applied
Remove Window Decorations
The last thing breaking the illusion of a sticky note on the desktop is the window decorations -- the titlebar and window controls. We can remove these using Qt window flags. We can also use a window flag to make the notes appear on top of other windows. Later we'll handle hiding and showing the notes via a tray application.
import sys

from PySide6.QtCore import Qt
from PySide6.QtWidgets import (
    QApplication,
    QTextEdit,
    QVBoxLayout,
    QWidget,
)

app = QApplication(sys.argv)


class NoteWindow(QWidget):
    def __init__(self):
        super().__init__()
        self.setWindowFlags(
            self.windowFlags()
            | Qt.WindowType.FramelessWindowHint
            | Qt.WindowType.WindowStaysOnTopHint
        )
        self.setStyleSheet(
            "background: #FFFF99; color: #62622f; border: 0; font-size: 16pt;"
        )
        layout = QVBoxLayout()

        self.text = QTextEdit()
        layout.addWidget(self.text)
        self.setLayout(layout)


note = NoteWindow()
note.show()
app.exec()
To set window flags, we need to import the Qt flags from the QtCore namespace. Then you can set flags on the window using .setWindowFlags(). Note that since windows have flags already set, and we don't want to replace them all, we get the current flags with .windowFlags() and then add the additional flags to it using boolean OR |. We've added two flags here -- Qt.WindowType.FramelessWindowHint which removes the window decorations, and Qt.WindowType.WindowStaysOnTopHint which keeps the windows on top.
Run this and you'll see a window with the decorations removed.
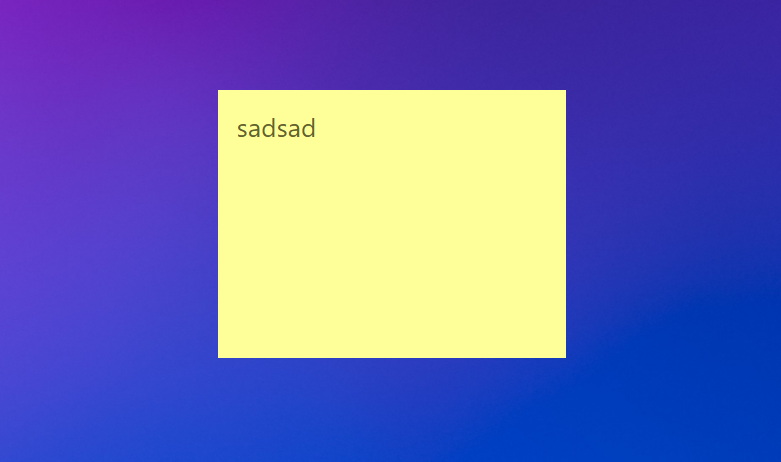 Note with the window decorations removed
With the window decorations removed you no longer have access to the close button. But you can still close the window using Alt-F4 (Windows) or the application menu (macOS).
While you can close the window, it'd be nicer if there was a button to do it. We can add a custom button using QPushButton and hook this up to the window's .close() method to re-implement this.
import sys

from PySide6.QtCore import Qt
from PySide6.QtWidgets import (
    QApplication,
    QHBoxLayout,
    QPushButton,
    QTextEdit,
    QVBoxLayout,
    QWidget,
)

app = QApplication(sys.argv)


class NoteWindow(QWidget):
    def __init__(self):
        super().__init__()
        self.setWindowFlags(
            self.windowFlags()
            | Qt.WindowType.FramelessWindowHint
            | Qt.WindowType.WindowStaysOnTopHint
        )
        self.setStyleSheet(
            "background: #FFFF99; color: #62622f; border: 0; font-size: 16pt;"
        )
        layout = QVBoxLayout()
        # layout.setSpacing(0)

        buttons = QHBoxLayout()
        self.close_btn = QPushButton("×")
        self.close_btn.setStyleSheet(
            "font-weight: bold; font-size: 25px; width: 25px; height: 25px;"
        )
        self.close_btn.setCursor(Qt.CursorShape.PointingHandCursor)
        self.close_btn.clicked.connect(self.close)
        buttons.addStretch()  # Add stretch on left to push button right.
        buttons.addWidget(self.close_btn)
        layout.addLayout(buttons)

        self.text = QTextEdit()
        layout.addWidget(self.text)
        self.setLayout(layout)


note = NoteWindow()
note.show()
app.exec()
Our close button is created using QPushButton with a unicode multiplication symbol (an x) as the label. We set a stylesheet on this button to size the label and button. Then we set a custom cursor on the button to make it clearer that this is a clickable thing that performs an action. Finally, we connect the .clicked signal of the button to the window's close method self.close. The button will close the window.
Later we'll use this button to delete notes.
To add the close button to the top right of the window, we create a horizontal layout with QHBoxLayout. We first add a stretch, then the push button. This has the effect of pushing the button to the right. Finally, we add our buttons layout to the main layout of the note, before the text edit. This puts it at the top of the window.
Run the code now and our note is complete!
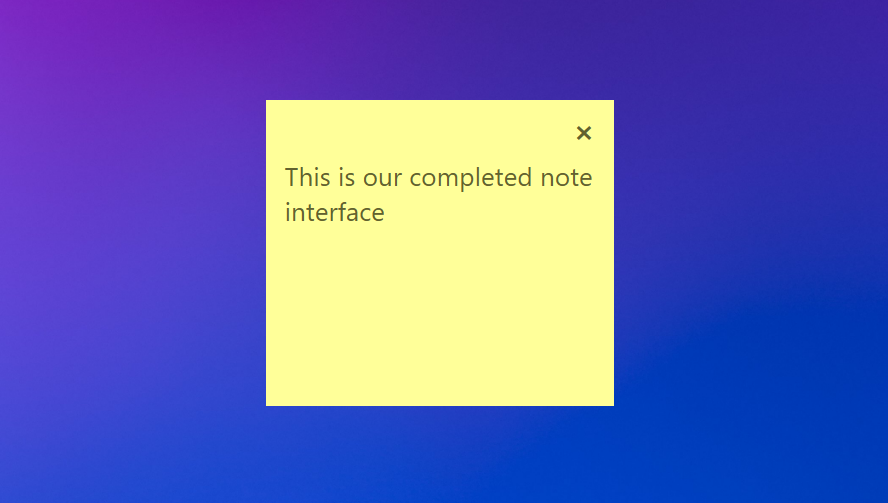 The complete note UI with close button
Movable notes
The note looks like a sticky note now, but we can't move it around and there is only one (unless we run the application multiple times concurrently). We'll fix both of those next, starting with the moveability of the notes.
This is fairly straightforward to achieve in PySide because Qt makes the raw mouse events available on all widgets. To implement moving, we can intercept these events and update the position of the window based on the distance the mouse has moved.
To implement this, add the following two methods to the bottom of the NoteWindow class.
class NoteWindow(QWidget):
    # ... existing code skipped

    def mousePressEvent(self, e):
        self.previous_pos = e.globalPosition()

    def mouseMoveEvent(self, e):
        delta = e.globalPosition() - self.previous_pos
        self.move(self.x() + delta.x(), self.y() + delta.y())
        self.previous_pos = e.globalPosition()
Clicking and dragging a window involves three actions: the mouse press, the mouse move and the mouse release. We have defined two methods here mousePressEvent and mouseMoveEvent. In mousePressEvent we receive the initial press of the mouse and store the position where the click occurred. This method is only called on the initial press of the mouse when starting to drag the window.
The mouseMoveEvent is called on every subsequent move while the mouse button remains pressed. On each move we take the new mouse position and subtract the previous position to get the delta -- that is, the change in mouse position from the initial press to the current event. Then we move the window by that amount, storing the new previous position after the move.
The effect of this is that ever time the mouseMoveEvent method is called, the window moves by the amount that the mouse has moved since the last call. The window moves -- or is dragged -- by the mouse.
Multiple notes
The note looks like a note, it is now moveable, but there is still only a single note -- not hugely useful! Let's fix that now.
Currently we're creating the NoteWindow when the application starts up, just before we call app.exec(). If we create new notes while the application is running it will need to happen in a function or method, which is triggered somehow. This introduces a new problem, since we need to have some way to store the NoteWindow objects so they aren't automatically deleted (and the window closed) when the function or method exits.
Python automatically deletes objects when they fall out of scope if there aren't any remaining references to them.
We can solve this by storing the NoteWindow objects somewhere. Usually we'd do this on our main window, but in this app there is no main window. There are a few options here, but in this case we're going to use a simple dictionary.
import sys

from PySide6.QtCore import Qt
from PySide6.QtWidgets import (
    QApplication,
    QHBoxLayout,
    QPushButton,
    QTextEdit,
    QVBoxLayout,
    QWidget,
)

app = QApplication(sys.argv)

# Store references to the NoteWindow objects in this, keyed by id.
active_notewindows = {}


class NoteWindow(QWidget):
    def __init__(self):
        super().__init__()
        self.setWindowFlags(
            self.windowFlags()
            | Qt.WindowType.FramelessWindowHint
            | Qt.WindowType.WindowStaysOnTopHint
        )
        self.setStyleSheet(
            "background: #FFFF99; color: #62622f; border: 0; font-size: 16pt;"
        )
        layout = QVBoxLayout()

        buttons = QHBoxLayout()
        self.close_btn = QPushButton("×")
        self.close_btn.setStyleSheet(
            "font-weight: bold; font-size: 25px; width: 25px; height: 25px;"
        )
        self.close_btn.clicked.connect(self.close)
        self.close_btn.setCursor(Qt.CursorShape.PointingHandCursor)
        buttons.addStretch()  # Add stretch on left to push button right.
        buttons.addWidget(self.close_btn)
        layout.addLayout(buttons)

        self.text = QTextEdit()
        layout.addWidget(self.text)
        self.setLayout(layout)

        # Store a reference to this note in the
        active_notewindows[id(self)] = self

    def mousePressEvent(self, e):
        self.previous_pos = e.globalPosition()

    def mouseMoveEvent(self, e):
        delta = e.globalPosition() - self.previous_pos
        self.move(self.x() + delta.x(), self.y() + delta.y())
        self.previous_pos = e.globalPosition()


def create_notewindow():
    note = NoteWindow()
    note.show()


create_notewindow()
create_notewindow()
create_notewindow()
create_notewindow()
app.exec()
In this code we've added our active_notewindows dictionary. This holds references to our NoteWindow objects, keyed by id(). Note that this is Python's internal id for this object, so it is consistent and unique. We can use this same id to remove the note. We add each note to this dictionary at the bottom of it's __init__ method.
Next we've implemented a create_notewindow() function which creates an instance of NoteWindow and shows it, just as before. Nothing else is needed, since the note itself handles storing it's references on creation.
Finally, we've added multiple calls to create_notewindow() to create multiple notes.
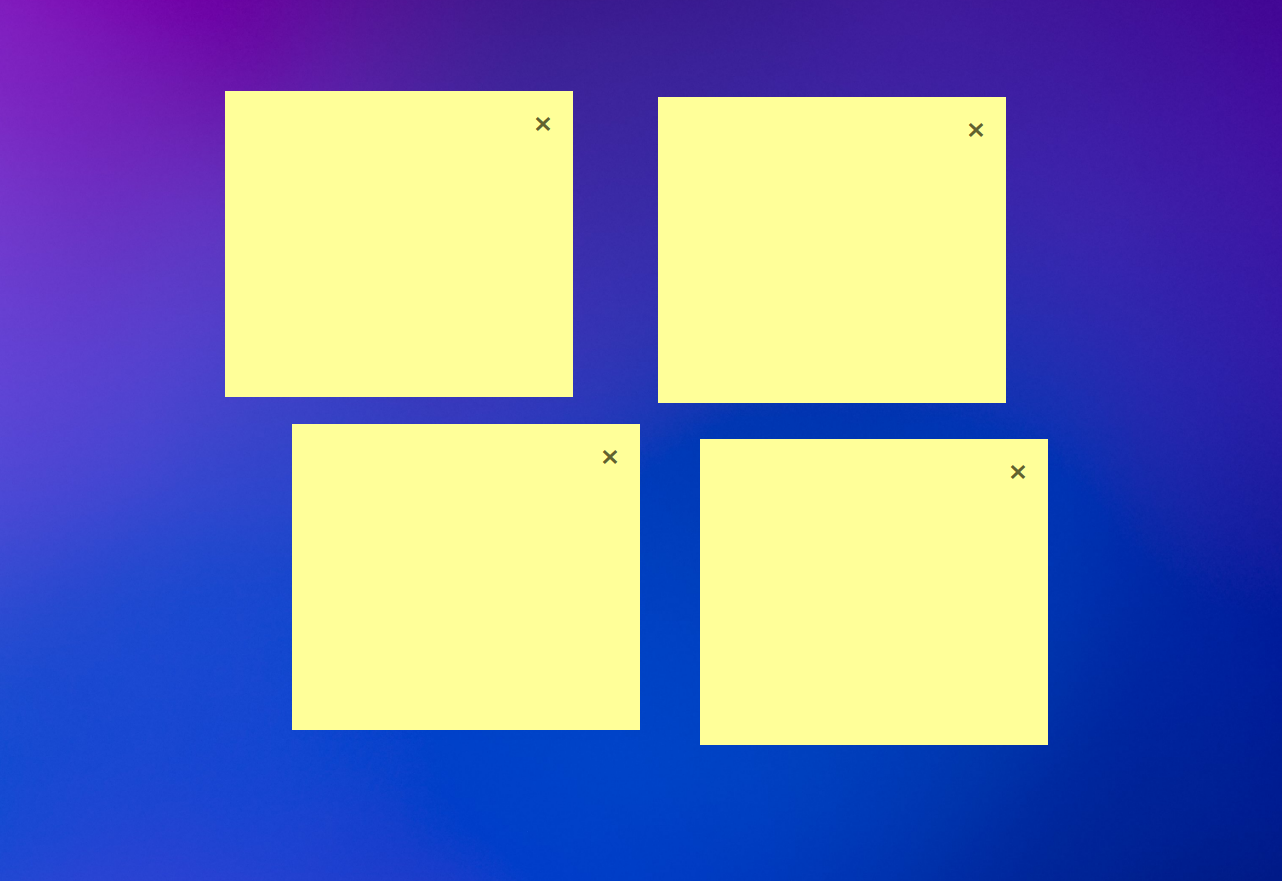 Multiple notes on the desktop
Adding Notes to the Tray
We can now create multiple notes programatically, but we want to be able to do this from the UI. We could implement this behavior on the notes themselves, but then it wouldn't work if al the notes had been closed or hidden. Instead, we'll create a tray application -- this will show in the system tray on Windows, or on the macOS toolbar. Users can use this to create new notes, and quit the application.
There's quite a lot to this, so we'll step through it in stages.
Update the code, adding the imports shown at the top, and the rest following the definition of create_notewindow.
import sys

from PySide6.QtCore import Qt
from PySide6.QtGui import QIcon
from PySide6.QtWidgets import (
    QApplication,
    QHBoxLayout,
    QPushButton,
    QSystemTrayIcon,
    QTextEdit,
    QVBoxLayout,
    QWidget,
)

# ... code hidden up to create_notewindow() definition

create_notewindow()

# Create system tray icon
icon = QIcon("sticky-note.png")

# Create the tray
tray = QSystemTrayIcon()
tray.setIcon(icon)
tray.setVisible(True)


def handle_tray_click(reason):
    # If the tray is left-clicked, create a new note.
    if (
        QSystemTrayIcon.ActivationReason(reason)
        == QSystemTrayIcon.ActivationReason.Trigger
    ):
        create_notewindow()


tray.activated.connect(handle_tray_click)

app.exec()
In this code we've first create an QIcon object passing in the filename of the icon to use. I'm using a sticky note icon from the Fugue icon set by designer Yusuke Kamiyamane. Feel free to use any icon you prefer.
We're using a relative path here. If you don't see the icon, make sure you're running the script from the same folder or provide the path.
The system tray icon is managed through a QSystemTrayIcon object. We set our icon on this, and set the tray icon to visible (so it is not automatically hidden by Windows).
QSystemTrayIcon has a signal activated which fires whenever the icon is activated in some way -- for example, being clicked with the left or right mouse button. We're only interested in a single left click for now -- we'll use the right click for our menu shortly. To handle the left click, we create a handler function which accepts reason (the reason for the activation) and then checks this against QSystemTrayIcon.ActivationReason.Trigger. This is the reason reported when a left click is used.
If the left mouse button has been clicked, we call create_notewindow() to create a new instance of a note.
If you run this example now, you'll see the sticky note in your tray and clicking on it will create a new note on the current desktop! You can create as many notes as you like, and once you close them all the application will close.
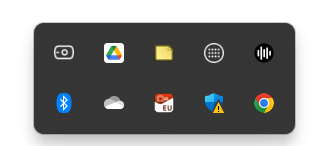 The sticky note icon in the tray
Purchasing Power Parity
Developers in [[ country ]] get [[ discount.discount_pc ]]% OFF on all books & courses with code [[ discount.coupon_code ]]This is happening because by default Qt will close an application once all it's windows have closed. This can be disabled, but we need to add another way to quit before we do it, otherwise our app will be unstoppable.
Adding a Menu
To allow the notes application to be closed from the tray, we need a menu. Sytem tray menus are normally accessible through right-clicking on the icon. To implement that we can set a QMenu as a context menu on the QSystemTrayIcon. The actions in menus in Qt are defined using QAction.
import sys

from PySide6.QtCore import Qt
from PySide6.QtGui import QAction, QIcon
from PySide6.QtWidgets import (
    QApplication,
    QHBoxLayout,
    QMenu,
    QPushButton,
    QSystemTrayIcon,
    QTextEdit,
    QVBoxLayout,
    QWidget,
)

# ... code hidden up to handle_tray_click

tray.activated.connect(handle_tray_click)


# Don't automatically close app when the last window is closed.
app.setQuitOnLastWindowClosed(False)

# Create the menu
menu = QMenu()
add_note_action = QAction("Add note")
add_note_action.triggered.connect(create_notewindow)
menu.addAction(add_note_action)

# Add a Quit option to the menu.
quit_action = QAction("Quit")
quit_action.triggered.connect(app.quit)
menu.addAction(quit_action)

# Add the menu to the tray
tray.setContextMenu(menu)


app.exec()
We create the menu using QMenu. Actions are created using QAction passing in the label as a string. This is the text that will be shown for the menu item.
The .triggered signal fires when the action is clicked (in a menu, or toolbar) or activated through a keyboard shortcut. Here we've connected the add note action to our create_notewindow function. We've also added an action to quit the application. This is connected to the built-in .quit slot on our QApplication instance.
The menu is set on the tray using .setContextMenu(). In Qt context menus are automatically shown when the user right clicks on the tray.
Finally, we have also disabled the behavior of closing the application when the last window is closed using app.setQuitOnLastWindowClosed(False). Now, once you close all the windows, the application will remain running in the background. You can close it by going to the tray, right-clicking and selecting "Quit".
If you find this annoying while developing, just comment this line out again.
We've had a lot of changes so far, so here is the current complete code.
import sys

from PySide6.QtCore import Qt
from PySide6.QtGui import QIcon
from PySide6.QtWidgets import (
    QApplication,
    QHBoxLayout,
    QPushButton,
    QSystemTrayIcon,
    QTextEdit,
    QVBoxLayout,
    QWidget,
)

app = QApplication(sys.argv)

# Store references to the NoteWindow objects in this, keyed by id.
active_notewindows = {}


class NoteWindow(QWidget):
    def __init__(self):
        super().__init__()
        self.setWindowFlags(
            self.windowFlags()
            | Qt.WindowType.FramelessWindowHint
            | Qt.WindowType.WindowStaysOnTopHint
        )
        self.setStyleSheet(
            "background: #FFFF99; color: #62622f; border: 0; font-size: 16pt;"
        )
        layout = QVBoxLayout()

        buttons = QHBoxLayout()
        self.close_btn = QPushButton("×")
        self.close_btn.setStyleSheet(
            "font-weight: bold; font-size: 25px; width: 25px; height: 25px;"
        )
        self.close_btn.clicked.connect(self.close)
        self.close_btn.setCursor(Qt.CursorShape.PointingHandCursor)
        buttons.addStretch()  # Add stretch on left to push button right.
        buttons.addWidget(self.close_btn)
        layout.addLayout(buttons)

        self.text = QTextEdit()
        layout.addWidget(self.text)
        self.setLayout(layout)

        # Store a reference to this note in the active_notewindows
        active_notewindows[id(self)] = self

    def mousePressEvent(self, e):
        self.previous_pos = e.globalPosition()

    def mouseMoveEvent(self, e):
        delta = e.globalPosition() - self.previous_pos
        self.move(self.x() + delta.x(), self.y() + delta.y())
        self.previous_pos = e.globalPosition()


def create_notewindow():
    note = NoteWindow()
    note.show()


create_notewindow()

# Create the icon
icon = QIcon("sticky-note.png")

# Create the tray
tray = QSystemTrayIcon()
tray.setIcon(icon)
tray.setVisible(True)


def handle_tray_click(reason):
    # If the tray is left-clicked, create a new note.
    if (
        QSystemTrayIcon.ActivationReason(reason)
        == QSystemTrayIcon.ActivationReason.Trigger
    ):
        create_notewindow()


tray.activated.connect(handle_tray_click)

app.exec()
If you run this now you will be able to right click the note in the tray to show the menu.
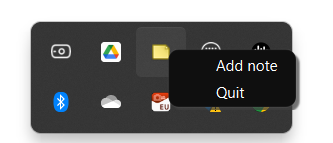 The sticky note icon in the tray showing its context menu
Test the Add note and Quit functionality to make sure they're working.
So, now we have our note UI implemented, the ability to create and remove notes and a persistent tray icon where we can also create notes & close the application. The last piece of the puzzle is persisting the notes between runs of the application -- if we leave a note on the desktop, we want it to still be there if we come back tomorrow. We'll implement that next.
Setting up the Notes database
To be able to store and load notes, we need an underlying data model. For this demo we're using SQLAlchemy as an interface to an SQLite database. This provides an Object-Relational Mapping (ORM) interface, which is a fancy way of saying we can interact with the database through Python objects.
We'll define our database in a separate file, to keep the UI file manageable. So start by creating a new file named database.py in your project folder.
In that file add the imports for SQLAlchemy, and instantiate the Base class for our models.
from sqlalchemy import Column, Integer, String, create_engine
from sqlalchemy.orm import declarative_base, sessionmaker

Base = declarative_base()
Next in the same database.py file, define our note database model. This inherits from the Base class we've just created, by calling declarative_base()
class Note(Base):
    __tablename__ = "note"
    id = Column(Integer, primary_key=True)
    text = Column(String(1000), nullable=False)
    x = Column(Integer, nullable=False, default=0)
    y = Column(Integer, nullable=False, default=0)
Each note object has 4 properties:
- id the unique ID for the given note, used to delete from the database
- text the text content of the note
- x the x position on the screen
- y the y position on the screen
Next we need to create the engine -- in this case, this is our SQLite file, which we're calling notes.db.We can then create the tables (if they don't already exist). Since our Note class registers itself with the Base we can do that by calling create_all on the Base class.
engine = create_engine("sqlite:///notes.db")

Base.metadata.create_all(engine)
Save the database.py file and run it
python database.py
After it is complete, if you look in the folder you should see the notes.db. This file contains the table structure for the Note model we defined above.
Finally, we need a session to interact with the database from the UI. Since we only need a single session when the app is running, we can go ahead and create it in this file and then import it into the UI code.
Add the following to database.py
# Create a session to handle updates.
Session = sessionmaker(bind=engine)
session = Session()
The final complete code for our database interface is shown below
from sqlalchemy import Column, Integer, String, create_engine
from sqlalchemy.orm import declarative_base, sessionmaker

Base = declarative_base()


class Note(Base):
    __tablename__ = "note"
    id = Column(Integer, primary_key=True)
    text = Column(String(1000), nullable=False)
    x = Column(Integer, nullable=False, default=0)
    y = Column(Integer, nullable=False, default=0)


engine = create_engine("sqlite:///notes.db")

Base.metadata.create_all(engine)

Session = sessionmaker(bind=engine)
session = Session()
Now that our data model is defined, and our database created, we can go ahead and interface our Notes model into the UI. This will allow us to load notes at startup (to show existing notes), save notes when they are updated and delete notes when they are removed.
Integrating the Data Model into our UI
Our data model holds the text content and x & y positions of the notes. To keep the active notes and model in sync we need a few things.
- Each
NoteWindowmust have it's own associated instance of theNoteobject. - New
Noteobjects should be created when creating a newNoteWindow. - The
NoteWindowshould sync it's initial state to aNoteif provided. - Moving & editing a
NoteWindowshould update the data in theNote. - Changes to
Noteshould be synced to the database.
We can tackle these one by one.
First let's setup our NoteWindow to accept, and store a reference to Note objects if provided, or create a new one if not.
import sys

from database import Note
from PySide6.QtCore import Qt
from PySide6.QtGui import QAction, QIcon
from PySide6.QtWidgets import (
    QApplication,
    QHBoxLayout,
    QMenu,
    QPushButton,
    QSystemTrayIcon,
    QTextEdit,
    QVBoxLayout,
    QWidget,
)

app = QApplication(sys.argv)

# Store references to the NoteWindow objects in this, keyed by id.
active_notewindows = {}


class NoteWindow(QWidget):
    def __init__(self, note=None):
        super().__init__()

        # ... add to the bottom of the __init__ method

        if note is None:
            self.note = Note()
        else:
            self.note = note
In this code we've imported the Note object from our database.py file. In the __init__ of our NoteWindow we've added an optional parameter to receive a Note object. If this is None (or nothing provided) a new Note will be created instead. The passed, or created note, is then stored on the NoteWindow so we can use it later.
This Note object is still not being loaded, updated, or persisted to the database. So let's implement that next. We add two methods, load() and save() to our NoteWindow to handle the loading and saving of data.
from database import Note, session

# ... skipped other imports, unchanged.

class NoteWindow(QWidget):
    def __init__(self, note=None):
        super().__init__()

        # ... modify the close_btn handler to use delete.
        self.close_btn.clicked.connect(self.delete)


        # ... rest of the code hidden.

        # If no note is provided, create one.
        if note is None:
            self.note = Note()
            self.save()
        else:
            self.note = note
            self.load()

    # ... add the following to the end of the class definition.

    def load(self):
        self.move(self.note.x, self.note.y)
        self.text.setText(self.note.text)

    def save(self):
        self.note.x = self.x()
        self.note.y = self.y()
        self.note.text = self.text.toPlainText()
        # Write the data to the database, adding the Note object to the
        # current session and committing the changes.
        session.add(self.note)
        session.commit()

    def delete(self):
        session.delete(self.note)
        session.commit()
        del active_notewindows[id(self)]
        self.close()
The load() method takes the x and y position from the Note object stored in self.note and updates the NoteWindow position and content to match. The save() method takes the NoteWindow position and content and sets that onto the Note object. It then adds the note to the current database session and commits the changes
Each commit starts a new session. Adding the Note to the session is indicating that we want it's changes persisted.
The delete() method handles deletion of the current note. This involves 3 things:
- passing the
Noteobject tosession.deleteto remove it from the database, - deleting the reference to our window from the
active_notewindows(so the object will be tidied up) - calling
.close()to hide the window immediately.
Usually (2) will cause the object to be cleaned up, and that will close the window indirectly. But that may be delayed, which would mean sometimes the close button doesn't seem to work straight away. We call .close() to make it immediate.
We need to modify the close_btn.clicked signal to point to our delete method.
Next we've added a load() call to the __init__ when a Note object is passed. We also call .save() for newly created notes to persist them immediately, so our delete handler will work before editing.
Finally, we need to handle saving the note whenever it changes. We have two ways
that the note can change -- when it's moved, or when it's edited. For the first we could do this on each mouse move, but it's a bit redundant. We only care where the note ends up while dragging -- that is, where it is when the mouse is released. We can get this through the mouseReleased method.
from database import Note, session

# ... skipped other imports, unchanged.

class NoteWindow(QWidget):

    # ... add the mouseReleaseEvent to the events on the NoteWindow.

    def mousePressEvent(self, e):
        self.previous_pos = e.globalPosition()

    def mouseMoveEvent(self, e):
        delta = e.globalPosition() - self.previous_pos
        self.move(self.x() + delta.x(), self.y() + delta.y())
        self.previous_pos = e.globalPosition()

    def mouseReleaseEvent(self, e):
        self.save()

    # ... the load and save methods are under here, unchanged.
That's all there is to it: when the mouse button is released, we save the current content and position by calling .save().
You might be wondering why we don't just save the position at this point? Usually it's better to implement a single load & save (persist/restore) handler that can be called for all situations. It avoids needing implementations for each case.
There have been a lot of partial code changes in this section, so here is the complete current code.
import sys

from database import Note, session
from PySide6.QtCore import Qt
from PySide6.QtGui import QAction, QIcon
from PySide6.QtWidgets import (
    QApplication,
    QHBoxLayout,
    QMenu,
    QPushButton,
    QSystemTrayIcon,
    QTextEdit,
    QVBoxLayout,
    QWidget,
)

app = QApplication(sys.argv)

# Store references to the NoteWindow objects in this, keyed by id.
active_notewindows = {}


class NoteWindow(QWidget):
    def __init__(self, note=None):
        super().__init__()

        self.setWindowFlags(
            self.windowFlags()
            | Qt.WindowType.FramelessWindowHint
            | Qt.WindowType.WindowStaysOnTopHint
        )
        self.setStyleSheet(
            "background: #FFFF99; color: #62622f; border: 0; font-size: 16pt;"
        )
        layout = QVBoxLayout()

        buttons = QHBoxLayout()
        self.close_btn = QPushButton("×")
        self.close_btn.setStyleSheet(
            "font-weight: bold; font-size: 25px; width: 25px; height: 25px;"
        )
        self.close_btn.clicked.connect(self.delete)
        self.close_btn.setCursor(Qt.CursorShape.PointingHandCursor)
        buttons.addStretch()  # Add stretch on left to push button right.
        buttons.addWidget(self.close_btn)
        layout.addLayout(buttons)

        self.text = QTextEdit()
        layout.addWidget(self.text)
        self.setLayout(layout)

        self.text.textChanged.connect(self.save)

        # Store a reference to this note in the active_notewindows
        active_notewindows[id(self)] = self

        # If no note is provided, create one.
        if note is None:
            self.note = Note()
            self.save()
        else:
            self.note = note
            self.load()

    def mousePressEvent(self, e):
        self.previous_pos = e.globalPosition()

    def mouseMoveEvent(self, e):
        delta = e.globalPosition() - self.previous_pos
        self.move(self.x() + delta.x(), self.y() + delta.y())
        self.previous_pos = e.globalPosition()

    def mouseReleaseEvent(self, e):
        self.save()

    def load(self):
        self.move(self.note.x, self.note.y)
        self.text.setText(self.note.text)

    def save(self):
        self.note.x = self.x()
        self.note.y = self.y()
        self.note.text = self.text.toPlainText()
        # Write the data to the database, adding the Note object to the
        # current session and committing the changes.
        session.add(self.note)
        session.commit()

    def delete(self):
        session.delete(self.note)
        session.commit()
        del active_notewindows[id(self)]
        self.close()


def create_notewindow():
    note = NoteWindow()
    note.show()


create_notewindow()

# Create the icon
icon = QIcon("sticky-note.png")

# Create the tray
tray = QSystemTrayIcon()
tray.setIcon(icon)
tray.setVisible(True)


def handle_tray_click(reason):
    # If the tray is left-clicked, create a new note.
    if (
        QSystemTrayIcon.ActivationReason(reason)
        == QSystemTrayIcon.ActivationReason.Trigger
    ):
        create_notewindow()


tray.activated.connect(handle_tray_click)


# Don't automatically close app when the last window is closed.
app.setQuitOnLastWindowClosed(False)

# Create the menu
menu = QMenu()
# Add the Add Note option to the menu.
add_note_action = QAction("Add note")
add_note_action.triggered.connect(create_notewindow)
menu.addAction(add_note_action)

# Add a Quit option to the menu.
quit_action = QAction("Quit")
quit_action.triggered.connect(app.quit)
menu.addAction(quit_action)
# Add the menu to the tray
tray.setContextMenu(menu)


app.exec()
If you run the application at this point it will be persisting data to the database as you edit it.
If you want to look at the contents of the SQLite database I can recommend DB Browser for SQLite. It's open source & free.
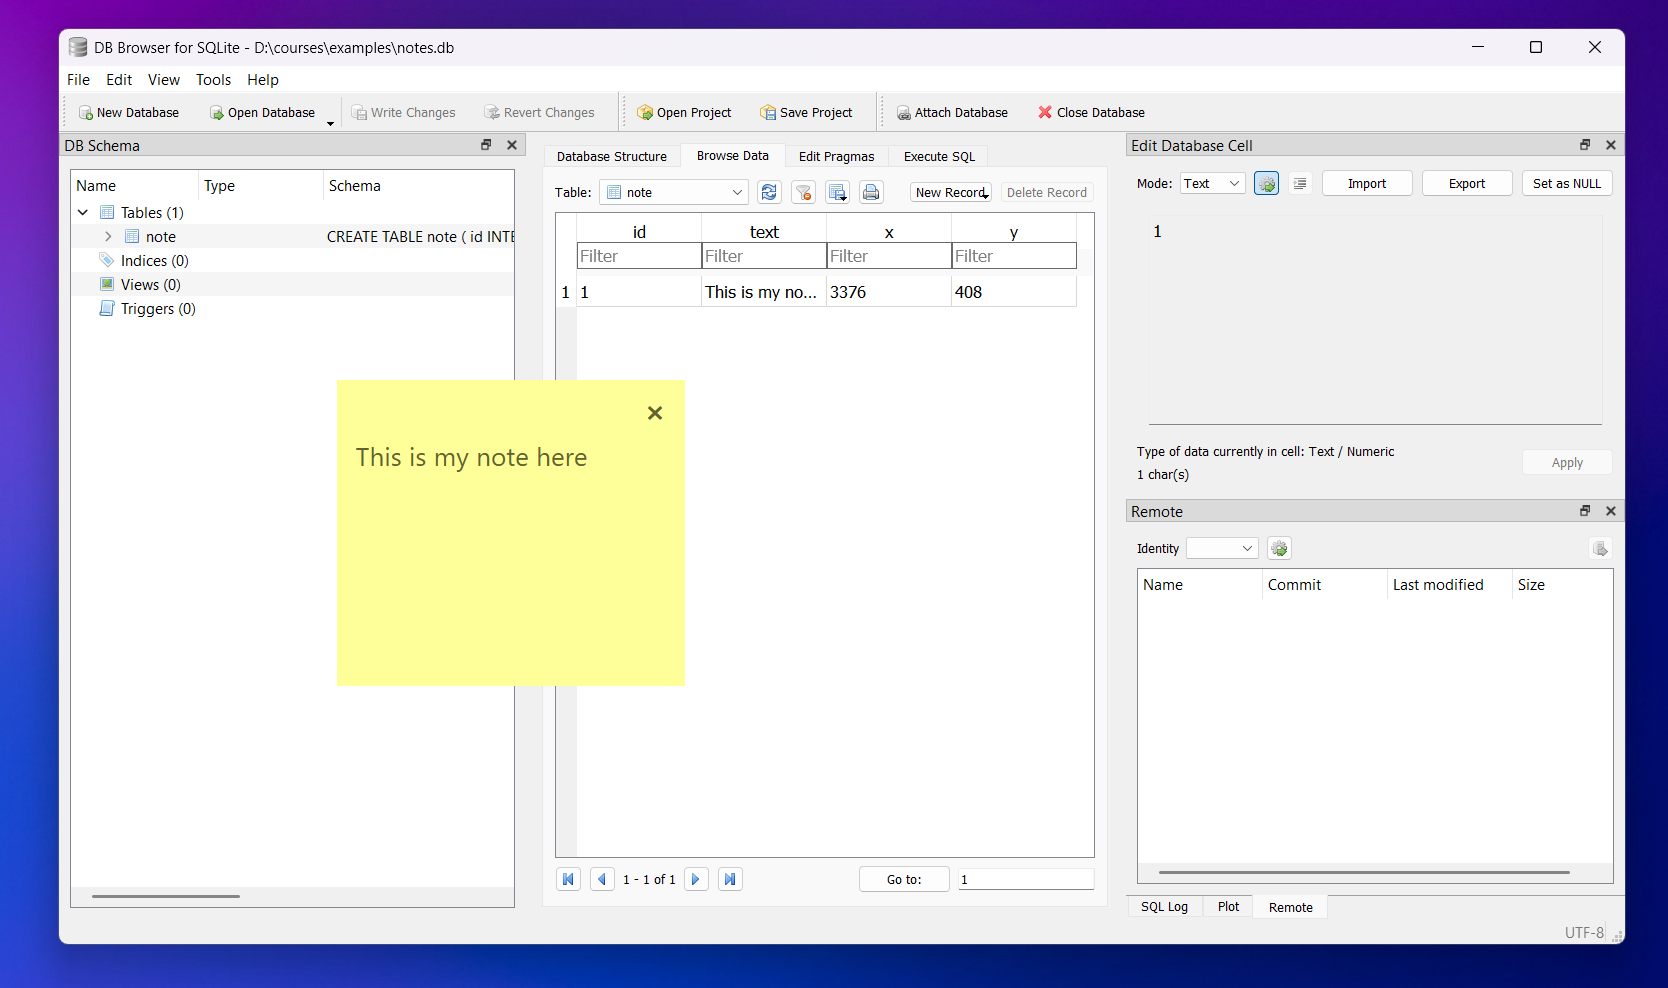 The note data persisted to the SQLite database
Starting up
So our notes are being created, added to the database, updated and deleted. The last piece of the puzzle is restoring the previous state at start up.
We already have all the bits in place for this, we just need to handle the startup itself. To recreate the notes we can query the database to get a list of Note objects and then iterate through this, creating new NoteWindow instances (using our create_notewindow function).
def create_notewindow(note=None):
    note = NoteWindow(note)
    note.show()


existing_notes = session.query(Note).all()

if existing_notes:
    for note in existing_notes:
        create_notewindow(note)
else:
    create_notewindow()
First we've modified the create_notewindow function to accept an (optional) Note object which is passed through to the created NoteWindow.
Using the session we query session.query(Note).all() to get all the Note objects. If there any, we iterate them creating them. If not, we create a single note with no associated Note object (this will be created inside the NoteWindow).
That's it! The full final code is shown below:
import sys

from database import Note, session
from PySide6.QtCore import Qt
from PySide6.QtGui import QAction, QIcon
from PySide6.QtWidgets import (
    QApplication,
    QHBoxLayout,
    QMenu,
    QPushButton,
    QSystemTrayIcon,
    QTextEdit,
    QVBoxLayout,
    QWidget,
)

app = QApplication(sys.argv)

# Store references to the NoteWindow objects in this, keyed by id.
active_notewindows = {}


class NoteWindow(QWidget):
    def __init__(self, note=None):
        super().__init__()

        self.setWindowFlags(
            self.windowFlags()
            | Qt.WindowType.FramelessWindowHint
            | Qt.WindowType.WindowStaysOnTopHint
        )
        self.setStyleSheet(
            "background: #FFFF99; color: #62622f; border: 0; font-size: 16pt;"
        )
        layout = QVBoxLayout()

        buttons = QHBoxLayout()
        self.close_btn = QPushButton("×")
        self.close_btn.setStyleSheet(
            "font-weight: bold; font-size: 25px; width: 25px; height: 25px;"
        )
        self.close_btn.clicked.connect(self.delete)
        self.close_btn.setCursor(Qt.CursorShape.PointingHandCursor)
        buttons.addStretch()  # Add stretch on left to push button right.
        buttons.addWidget(self.close_btn)
        layout.addLayout(buttons)

        self.text = QTextEdit()
        layout.addWidget(self.text)
        self.setLayout(layout)

        self.text.textChanged.connect(self.save)

        # Store a reference to this note in the active_notewindows
        active_notewindows[id(self)] = self

        # If no note is provided, create one.
        if note is None:
            self.note = Note()
            self.save()
        else:
            self.note = note
            self.load()

    def mousePressEvent(self, e):
        self.previous_pos = e.globalPosition()

    def mouseMoveEvent(self, e):
        delta = e.globalPosition() - self.previous_pos
        self.move(self.x() + delta.x(), self.y() + delta.y())
        self.previous_pos = e.globalPosition()

    def mouseReleaseEvent(self, e):
        self.save()

    def load(self):
        self.move(self.note.x, self.note.y)
        self.text.setText(self.note.text)

    def save(self):
        self.note.x = self.x()
        self.note.y = self.y()
        self.note.text = self.text.toPlainText()
        # Write the data to the database, adding the Note object to the
        # current session and committing the changes.
        session.add(self.note)
        session.commit()

    def delete(self):
        session.delete(self.note)
        session.commit()
        del active_notewindows[id(self)]
        self.close()


def create_notewindow(note=None):
    note = NoteWindow(note)
    note.show()


existing_notes = session.query(Note).all()

if existing_notes:
    for note in existing_notes:
        create_notewindow(note)
else:
    create_notewindow()

# Create the icon
icon = QIcon("sticky-note.png")

# Create the tray
tray = QSystemTrayIcon()
tray.setIcon(icon)
tray.setVisible(True)


def handle_tray_click(reason):
    # If the tray is left-clicked, create a new note.
    if (
        QSystemTrayIcon.ActivationReason(reason)
        == QSystemTrayIcon.ActivationReason.Trigger
    ):
        create_notewindow()


tray.activated.connect(handle_tray_click)


# Don't automatically close app when the last window is closed.
app.setQuitOnLastWindowClosed(False)

# Create the menu
menu = QMenu()
# Add the Add Note option to the menu.
add_note_action = QAction("Add note")
add_note_action.triggered.connect(create_notewindow)
menu.addAction(add_note_action)

# Add a Quit option to the menu.
quit_action = QAction("Quit")
quit_action.triggered.connect(app.quit)
menu.addAction(quit_action)
# Add the menu to the tray
tray.setContextMenu(menu)


app.exec()
If you run the app now, you can create new notes as before, but when you exit (using the Quit option from the tray) and restart, the previous notes will reappear. If you close the notes, they will be deleted. On startup, if there are no notes in the database an initial note will be created for you.
Conclusion
That's it! We have a fully functional desktop sticky note application, which you can use to keep simple bits of text until you need them again. We've learnt how to build an application up step by step from a basic outline window. We've added basic styles using QSS and used window flags to control the appearance of notes on the desktop. We've also seen how to create a system tray application, adding context menus and default behaviours (via a left mouse click). Finally, we've created a simple data model using SQLAlchemy and hooked that into our UI to persist the UI state between runs of the applications.
Try and extend this example further, for example:
- Add multicolor notes, using a Python
listof hex colors andrandom.choiceto select a new color each time a note is created. Can you persist this in the database too? - Add an option in the tray to show/hide all notes. Remember we have all the
NoteWindowobjects inactive_notewindows. You can show and hide windows in Qt using.show()and.hide().
Think about some additional features you'd like or expect to see in a desktop notes application and see if you can add them yourself!
Packaging Python Applications with PyInstaller by Martin Fitzpatrick — This step-by-step guide walks you through packaging your own Python applications from simple examples to complete installers and signed executables.
