So far we've looked at how to run work in separate threads, allowing you to do complex tasks without interrupting your UI. This works great when using Python libraries to accomplish tasks, but sometimes you want to run external applications, passing parameters and getting the results.
In this tutorial we'll look at QProcess, the Qt system for running external programs from within your own app.
The external program
To be able to test running external programs with QProcess we need to have something to run. Here we'll create a simple Python script for that purpose, which we can then launch from within our application. Put the following in a file, and save it with the name dummy_script.py.
I'm using Python here to be sure it works on all platforms. If you have an existing command line tool you'd like to test with, you can substitute that instead.
Don't worry too much about the contents of this script, it's just a series of print (stream write) statements with a half second wait after. This simulates a long-running external program which is printing out periodic status messages. Later we'll see how to extract data from this output.
import sys
import time


def flush_then_wait():
    sys.stdout.flush()
    sys.stderr.flush()
    time.sleep(0.5)


sys.stdout.write("Script stdout 1\n")
sys.stdout.write("Script stdout 2\n")
sys.stdout.write("Script stdout 3\n")
sys.stderr.write("Total time: 00:05:00\n")
sys.stderr.write("Total complete: 10%\n")
flush_then_wait()

sys.stdout.write("name=Martin\n")
sys.stdout.write("Script stdout 4\n")
sys.stdout.write("Script stdout 5\n")
sys.stderr.write("Total complete: 30%\n")
flush_then_wait()

sys.stderr.write("Elapsed time: 00:00:10\n")
sys.stderr.write("Elapsed time: 00:00:50\n")
sys.stderr.write("Total complete: 50%\n")
sys.stdout.write("country=Nederland\n")
flush_then_wait()

sys.stderr.write("Elapsed time: 00:01:10\n")
sys.stderr.write("Total complete: 100%\n")
sys.stdout.write("Script stdout 6\n")
sys.stdout.write("Script stdout 7\n")
sys.stdout.write("website=www.mfitzp.com\n")
flush_then_wait()
Now we have our dummy_script.py we can run it from within our Qt application.
Basic application
To experiment with running programs through QProcess we need a skeleton application. This is shown below -- a simple window with a QPushButton and QTextArea. Pressing the push button calls our custom slot start_process, in which we'll execute our external process.
Create GUI Applications with Python & Qt6 by Martin Fitzpatrick — (PyQt6 Edition) The hands-on guide to making apps with Python — Over 10,000 copies sold!
from PySide2.QtWidgets import (QApplication, QMainWindow, QPushButton, QPlainTextEdit,
                                QVBoxLayout, QWidget)
from PySide2.QtCore import QProcess
import sys


class MainWindow(QMainWindow):

    def __init__(self):
        super().__init__()

        self.btn = QPushButton("Execute")
        self.btn.pressed.connect(self.start_process)
        self.text = QPlainTextEdit()
        self.text.setReadOnly(True)

        l = QVBoxLayout()
        l.addWidget(self.btn)
        l.addWidget(self.text)

        w = QWidget()
        w.setLayout(l)

        self.setCentralWidget(w)

    def start_process(self):
        # We'll run our process here.
        pass

app = QApplication(sys.argv)

w = MainWindow()
w.show()

app.exec_()
Make sure it works, there's not much to look at yet -- pressing the button doesn't do anything either.
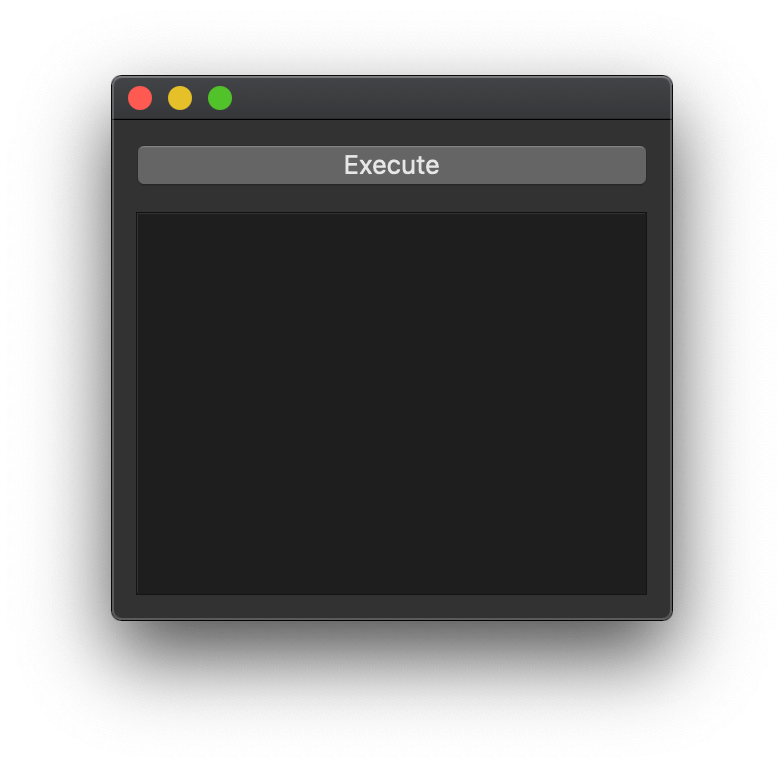 The skeleton application.
Using QProcess to execute external applications.
Executing external programs is fairly straightforward with QProcess. First you create a QProcess object and then call .start() passing in the command to execute and a list of string arguments.
p = QProcess()
p.start("<program>", [<arguments>])
For our example we're running the custom dummy_script.py script with Python, so our executable is python (or python3) and our arguments are just dummy_script.py.
p = QProcess()
p.start("python3", ['dummy_script.py'])
If you are running another command line program you'd need to specify arguments for it. For example, using ffmpeg to extract information from a video file.
p = QProcess()
p.start("ffprobe", ['-show_format', '-show_streams', 'a.mp4.py'])
Use this same approach with your own command line program, remembering to split the arguments up into individual items in the list.
We can take the p.start("python3", ['dummy_script.py']) example and add it to our application skeleton as follows. We also add a helper method message() to write messages into our text box in the UI.
from PySide2.QtWidgets import (QApplication, QMainWindow, QPushButton, QPlainTextEdit,
                                QVBoxLayout, QWidget)
from PySide2.QtCore import QProcess
import sys


class MainWindow(QMainWindow):

    def __init__(self):
        super().__init__()

        self.btn = QPushButton("Execute")
        self.btn.pressed.connect(self.start_process)
        self.text = QPlainTextEdit()
        self.text.setReadOnly(True)

        l = QVBoxLayout()
        l.addWidget(self.btn)
        l.addWidget(self.text)

        w = QWidget()
        w.setLayout(l)

        self.setCentralWidget(w)

    def message(self, s):
        self.text.appendPlainText(s)

    def start_process(self):
        self.message("Executing process.")
        self.p = QProcess()  # Keep a reference to the QProcess (e.g. on self) while it's running.
        self.p.start("python3", ['dummy_script.py'])


app = QApplication(sys.argv)

w = MainWindow()
w.show()

app.exec_()
Notice that you must keep a reference to the created QProcess object while it's running, e.g. on self.p. If not, then the object will be deleted prematurely and you'll see a QProcess: Destroyed while process ("python3") is still running. error.
If you run this example and press the button, nothing will happen. The external script is running but you can't see the output.
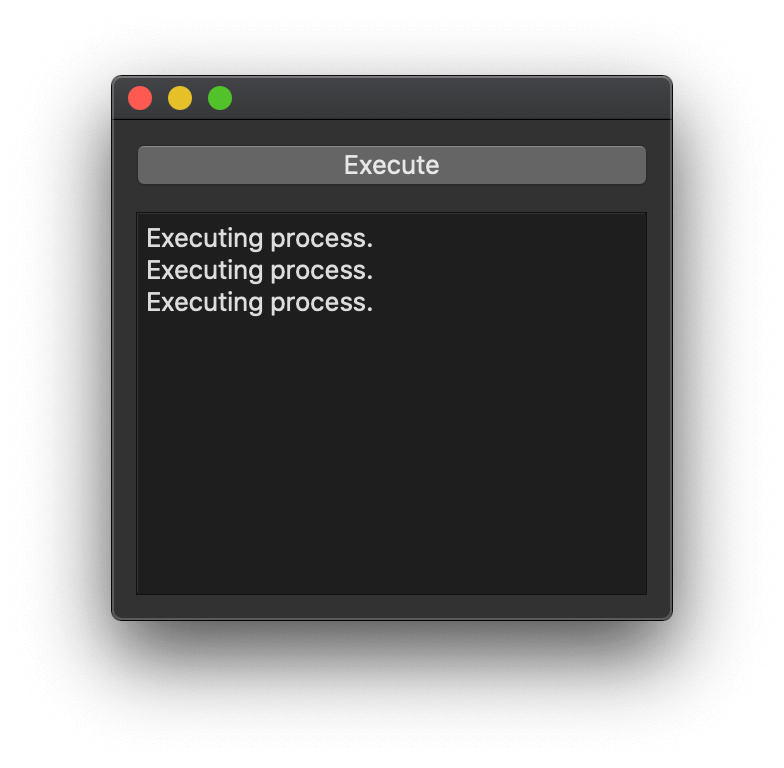 The execution message is shown, but not much else.
If you press the button repeatedly, you may find that you see a message like this --
QProcess: Destroyed while process ("python3") is still running.
This is because if you press the button while a process is already running, creating the new process replaces the reference to the existing QProcess object in self.p, deleting it. We can avoid this by checking the value of self.p before executing a new process, and hooking up a finished signal to reset it back to None, e.g.
from PySide2.QtWidgets import (QApplication, QMainWindow, QPushButton, QPlainTextEdit,
                                QVBoxLayout, QWidget)
from PySide2.QtCore import QProcess
import sys


class MainWindow(QMainWindow):

    def __init__(self):
        super().__init__()

        self.p = None

        self.btn = QPushButton("Execute")
        self.btn.pressed.connect(self.start_process)
        self.text = QPlainTextEdit()
        self.text.setReadOnly(True)

        l = QVBoxLayout()
        l.addWidget(self.btn)
        l.addWidget(self.text)

        w = QWidget()
        w.setLayout(l)

        self.setCentralWidget(w)

    def message(self, s):
        self.text.appendPlainText(s)

    def start_process(self):
        if self.p is None:  # No process running.
            self.message("Executing process")
            self.p = QProcess()  # Keep a reference to the QProcess (e.g. on self) while it's running.
            self.p.finished.connect(self.process_finished)  # Clean up once complete.
            self.p.start("python3", ['dummy_script.py'])

    def process_finished(self):
        self.message("Process finished.")
        self.p = None


app = QApplication(sys.argv)

w = MainWindow()
w.show()

app.exec_()
Running this now, you can start the process and -- once it has completed -- start it again. Each time the process completes, you'll see the "Process finished." message in the text box.
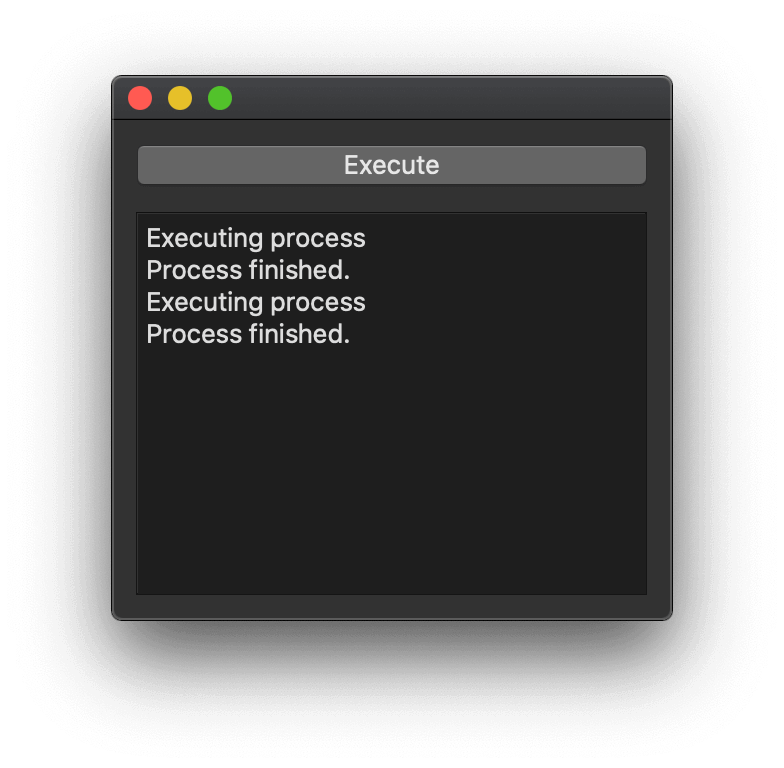 The Process finished message is shown once it completes.
Getting data from the QProcess
So far we've executed an external program and been notified when it started and stopped, but know nothing about what it's doing. This is fine in some cases, where you just want the job to run, but often you'll want some more detailed feedback. Helpfully, QProcess provides a number of signals which can be used to track the progress and state of processes.
If you're familiar with running external processes using subprocess in Python, you may be familiar with streams. These are file-like objects you use to retrieve data from a running process. The two standard streams are standard output and standard error. The former receives result data the application is outputting, while the second receives diagnostic or error messages. Depending on what you're interested in, both of these can be useful -- many programs (like our dummy_script.py output progress information to the standard error stream.
In Qt land, the same principles apply. The QProcess object has two signals .readyReadStandardOutput and .readyReadStandardError which are used to notify when data is available in the respective streams. We can then read from the process to get the latest data.
Packaging Python Applications with PyInstaller by Martin Fitzpatrick — This step-by-step guide walks you through packaging your own Python applications from simple examples to complete installers and signed executables.
Below is an example setup for a QProcess, which connects up readyReadStandardOutput and .readyReadStandardError as well as tracking state changes and finish signals.
p = QProcess()
p.readyReadStandardOutput.connect(self.handle_stdout)
p.readyReadStandardError.connect(self.handle_stderr)
p.stateChanged.connect(self.handle_state)
p.finished.connect(self.cleanup)
p.start("python", ["dummy_script.py"])
The .stateChanged signal fires whenever the process status changes. Valid values -- defined in the QProcess.ProcessState enum -- are shown below.
| Constant | Value | Description |
|---|---|---|
QProcess.NotRunning |
0 | The process is not running. |
QProcess.Starting |
1 | The process is starting, but the program has not yet been invoked. |
QProcess.Running |
2 | The process is running and is ready for reading and writing. |
Putting that into our example and implementing the handler methods for each gives us the following complete code.
from PySide2.QtWidgets import (QApplication, QMainWindow, QPushButton, QPlainTextEdit,
                                QVBoxLayout, QWidget)
from PySide2.QtCore import QProcess
import sys


class MainWindow(QMainWindow):

    def __init__(self):
        super().__init__()

        self.p = None

        self.btn = QPushButton("Execute")
        self.btn.pressed.connect(self.start_process)
        self.text = QPlainTextEdit()
        self.text.setReadOnly(True)

        l = QVBoxLayout()
        l.addWidget(self.btn)
        l.addWidget(self.text)

        w = QWidget()
        w.setLayout(l)

        self.setCentralWidget(w)

    def message(self, s):
        self.text.appendPlainText(s)

    def start_process(self):
        if self.p is None:  # No process running.
            self.message("Executing process")
            self.p = QProcess()  # Keep a reference to the QProcess (e.g. on self) while it's running.
            self.p.readyReadStandardOutput.connect(self.handle_stdout)
            self.p.readyReadStandardError.connect(self.handle_stderr)
            self.p.stateChanged.connect(self.handle_state)
            self.p.finished.connect(self.process_finished)  # Clean up once complete.
            self.p.start("python3", ['dummy_script.py'])

    def handle_stderr(self):
        data = self.p.readAllStandardError()
        stderr = bytes(data).decode("utf8")
        self.message(stderr)

    def handle_stdout(self):
        data = self.p.readAllStandardOutput()
        stdout = bytes(data).decode("utf8")
        self.message(stdout)

    def handle_state(self, state):
        states = {
            QProcess.NotRunning: 'Not running',
            QProcess.Starting: 'Starting',
            QProcess.Running: 'Running',
        }
        state_name = states[state]
        self.message(f"State changed: {state_name}")

    def process_finished(self):
        self.message("Process finished.")
        self.p = None


app = QApplication(sys.argv)

w = MainWindow()
w.show()

app.exec_()
If you run this, you'll see the standard output, standard error, state changes and start/stop messages all being printed to the text box. Note that we convert the states back to friendly strings before output (using a dict to map from the enum values).
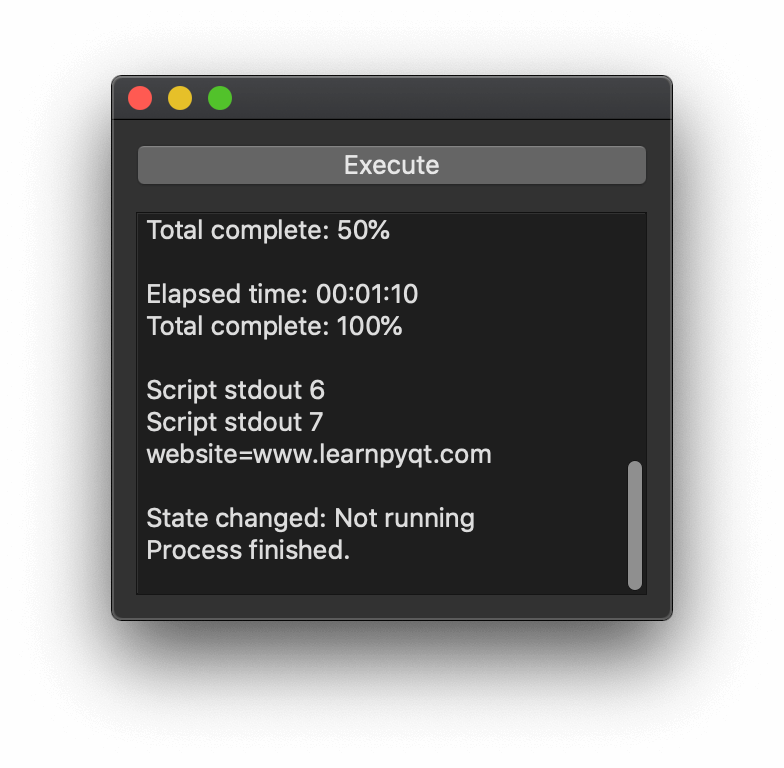 The output from our custom script is shown in the text box.
The output handling is a bit tricky and deserves a closer look.
        data = self.p.readAllStandardError()
        stderr = bytes(data).decode("utf8")
        self.message(stderr)
This is necessary because the QProcess.readAllStandardError and QProcess.readAllStandardOutput return data as bytes, wrapped in a Qt object. We must first convert this to a Python bytes() object, and then decode that bytestream to a string (here using UTF8 encoding).
Parsing data from process output
Currently we're just dumping the output from the program into the text box, but what if we wanted to extract some specific data from it? A common use case for this is to track progress from a running program, so we can show a progress bar as it completes.
In this example, our demo script dummy_script.py return a series of strings, including lines on standard error which show the current progress complete percentage -- e.g. Total complete: 50%. We can process these lines to a progress, and show this on the statusbar.
In the example below, we extract this using a custom regular expression. The simple_percent_parser function matches the standard error stream content and extracts a number between 00-100 for the progress. This value is used to update the progress bar added to the UI.
from PySide2.QtWidgets import (QApplication, QMainWindow, QPushButton, QPlainTextEdit,
                                QVBoxLayout, QWidget, QProgressBar)
from PySide2.QtCore import QProcess
import sys
import re

# A regular expression, to extract the % complete.
progress_re = re.compile("Total complete: (\d+)%")

def simple_percent_parser(output):
    """
    Matches lines using the progress_re regex,
    returning a single integer for the % progress.
    """
    m = progress_re.search(output)
    if m:
        pc_complete = m.group(1)
        return int(pc_complete)


class MainWindow(QMainWindow):

    def __init__(self):
        super().__init__()

        self.p = None

        self.btn = QPushButton("Execute")
        self.btn.pressed.connect(self.start_process)
        self.text = QPlainTextEdit()
        self.text.setReadOnly(True)

        self.progress = QProgressBar()
        self.progress.setRange(0, 100)

        l = QVBoxLayout()
        l.addWidget(self.btn)
        l.addWidget(self.progress)
        l.addWidget(self.text)

        w = QWidget()
        w.setLayout(l)

        self.setCentralWidget(w)

    def message(self, s):
        self.text.appendPlainText(s)

    def start_process(self):
        if self.p is None:  # No process running.
            self.message("Executing process")
            self.p = QProcess()  # Keep a reference to the QProcess (e.g. on self) while it's running.
            self.p.readyReadStandardOutput.connect(self.handle_stdout)
            self.p.readyReadStandardError.connect(self.handle_stderr)
            self.p.stateChanged.connect(self.handle_state)
            self.p.finished.connect(self.process_finished)  # Clean up once complete.
            self.p.start("python3", ['dummy_script.py'])

    def handle_stderr(self):
        data = self.p.readAllStandardError()
        stderr = bytes(data).decode("utf8")
        # Extract progress if it is in the data.
        progress = simple_percent_parser(stderr)
        if progress:
            self.progress.setValue(progress)
        self.message(stderr)

    def handle_stdout(self):
        data = self.p.readAllStandardOutput()
        stdout = bytes(data).decode("utf8")
        self.message(stdout)

    def handle_state(self, state):
        states = {
            QProcess.NotRunning: 'Not running',
            QProcess.Starting: 'Starting',
            QProcess.Running: 'Running',
        }
        state_name = states[state]
        self.message(f"State changed: {state_name}")

    def process_finished(self):
        self.message("Process finished.")
        self.p = None


app = QApplication(sys.argv)

w = MainWindow()
w.show()

app.exec_()
If you run this and start up a process, you'll see the progress bar gradually fill up as the progress messages are received from the dummy_script.py running through QProcess.
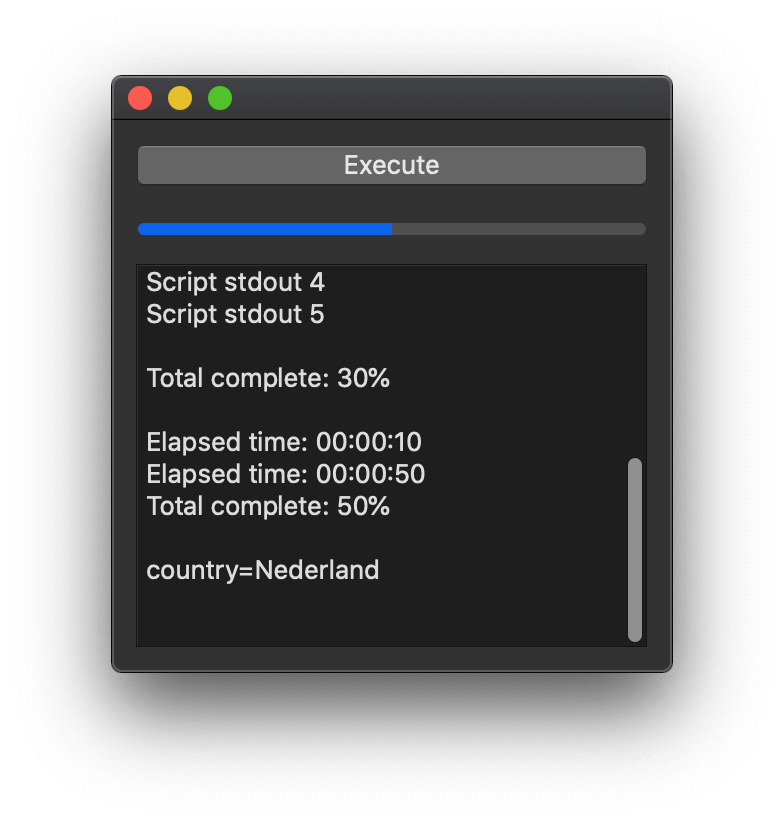 The progress bar fills up as the script completes.
This approach works well with any command line programs -- in some cases you may want to parse the standard output rather than standard error but the principles are identical. Sometimes programs will not give you a pre-calculated progress value and you'll need to get a little creative. If you like a challenge, try and modify the parser to extract the total time and elapsed time data from the dummy_script.py standard error and use this to calculate a progress bar. You can also try adapting the running for other command line programs.
Further improvements
In all of these examples we store a reference to the process in self.p, meaning we can only run a single process at once. But you are free to run as many processes as you like alongside your application. If you don't need to track information from them, you can simply store references to the processes in a list.
If you're running multiple external programs at once and do want to track their states, you may want to consider creating a manager class which does this for you. The PySide2 book contains more examples, including this manager combining QProcess stdout parsing with model views to create a live progress monitor for external processes.
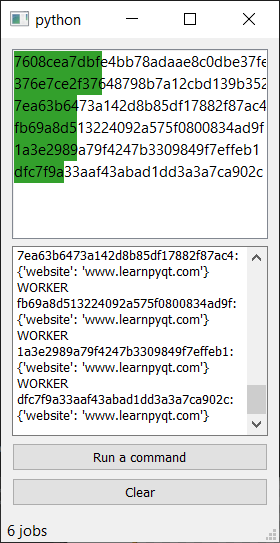 The process manager, showing active processes and progress
